A bow saw features a conventional straight saw blade and a hollow frame. The frame constitutes the handle and support of the saw, while the blade does the work of cutting and splitting materials.
Just like most handy tools, a saw blade has different parts with unique features. However, it does not go without stating how important it is to know the features of, and how to measure bow saw blades.
Measuring bow saw blades requires carefulness and precision. There are also special tools dedicated to this purpose, and this guide will show you how to use those tools to measure a bow saw blade.
This guide will also give you actionable steps you can follow to rightly take bow saw blade measurements.
And at the end, you’ll get insights as to how to properly install and maintain your bow saw blade.
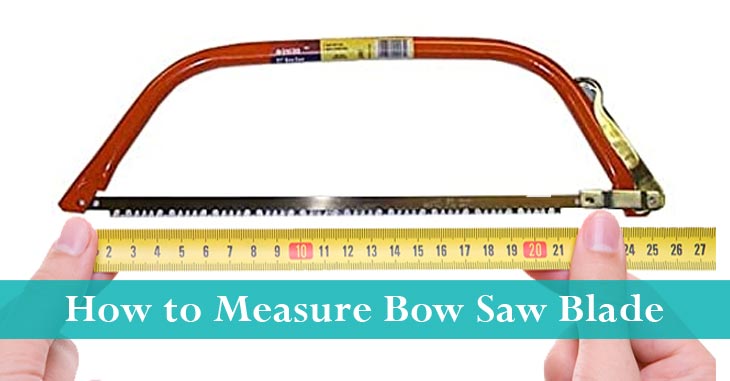
How to Measure Bow Saw Blade
Measuring bow saw blades might not be as easy as using them, but it is necessary to enjoy consistent efficiency in your work.
This is a step-by-step guide to put you through a bow saw blade measurement process.
Step 1: Get your Tools Handy
To measure this type of saw blade, you’ll need:
- Protective gloves
- A smooth, flat surface
- A tape rule
- A micrometer screw gauge
- Saw blade measuring gauge
Before you begin any measurements, it would be best to get these tools ready and positioned next to you. You wouldn’t want to pause the process to go in search of any tool.
Step 2: Protect your Hands
A saw blade, especially a sharp one, can be quite dangerous to handle. And because you’ll be handling virtually every part of the blade while measuring, always wear a protective glove first.
This protection will prevent you from sustaining injuries peradventure the blade slips or moves suddenly as you work.
Step 3: Uninstall the Blade
For easy accessibility, you need to uninstall a bow saw blade from the rest of the tool before taking measurements.
To do this, turn the wingnut in an anticlockwise direction until the handlebar releases the blade. The wingnut is a flat nut protruding from the back of the saw’s handle.
Once the handlebar becomes loose, gently unpin the blade from the rear blade mounting.
Afterward, unpin the front blade mounting, i.e., the joint between the blade and the top of the bow frame.
As soon as you detach your blade from the rest of the saw, you can now proceed to take the necessary measurements.
Step 4: Measure the Blade Length
To measure the length of your blade, there are two measurements to take. The first is the distance between both ends of the blade, while the other is between the front and rear pinholes.
To take length measurements, place your blade on the flat surface, and run the tape rule from one of its ends to the other. Takedown the measurements, and repeat for the distance between the pinholes.
Step 5: Measure the Blade Thickness
To measure the thickness of a bow saw blade, face it downward, and then fit a micrometer screw gauge to its side.
Place the anvil and spindle of the gauge on each side of the blade, adjust the locknut, and take your reading from the main scale as well as the thimble scale. Be careful not to move the blade as you adjust the scale.
Step 6: Measure the Tooth Per Inch
A bow saw blade has sharp, irregular parts known as teeth. These are the part of the saw that works through the material to be cut.
A blade’s tooth per inch is the number of teeth found on the blade per inch. And since a bow saw blade can be peg-toothed or peg and raker-toothed, you can measure its TPI in two ways.
For a Peg Tooth Blade;
Place your tape rule at the center of the gullet between two teeth. Measure an inch’s distance from left to right, and then count the number of teeth within the measurement.
Whatever the number of teeth is found within an inch is known as the blade’s TPI.
For a Peg and Raker Toothed Blade;
Raker-toothed bow saw blades always have a raker tooth after a group of three peg teeth. To measure TPI on this type of blade, place your tape rule at the center of the gullet between a peg tooth and a raker tooth.
Whatever number of teeth you measure per inch is the TPI of the blade.
Step 7: Measure the Tooth Hook Angle
For peg-toothed blades, the teeth can be inclined at different angles. They can also be arranged perpendicular to the blade plate.
For teeth that are angled, this angle is known as the blade’s tooth angle. It can also be negative or positive in value.
To measure the tooth hook angle, use a saw blade measuring gauge to check the inclination of each tooth.
Step 8: Measure the Tooth Pitch
A blade’s tooth pitch is the distance between a tooth’s tip and the next tooth. To measure the tooth pitch, place your tape rule at the tip of one tooth and then extend it to the next tip.
Ensure that your tape rule is kept upright and still during this measurement, as the figure can be quite small.
Step 9: Measure the Gullet
The gullet of a saw blade is the space between the base of each tooth. To measure the length or diameter of a blade’s gullet, measure the distance between the tip of one tooth to the bottom of the gullet nearest to that tooth.
Step 10: How to Fit a Bow Saw Properly
It is important to fit a bow saw properly after a replacement or a maintenance routine. An improperly fitted blade can snap during use and cause injuries.
The finish of your wood or metal work may not also come out well if you fail to fit your blade properly.
To fit a saw blade properly, follow the steps below;
- Ensure that Blade is of the Right Measurement
- Ensure that your new blade is right for the frame by comparing its measurement values with that of the former blade.
- If there is any inconsistency between the two blades, you may not achieve a perfect fit.
Step 11: Loosen the Wingnut
When you’ve ascertained that the blade is right for your frame, then start the installation by loosening the wingnut. This step allows the blade to hook properly in the pins.
Step 12: Hook the Blade Into the Pins
To hook the blade onto the pins, begin from the pin at the top of the frame. Afterward, reposition the saw, and hook the side on the handle.
Step 13: Tighten the Wingnut
When you fix the two ends of the blade onto the frame, tighten the wingnut by turning it in a clockwise direction.
This movement fits the metal bar into place to keep the blade as taut as possible.
However, be careful not to overtighten the wingnut because it could exert excess tension on the blade.
When you work with an overtightened blade, it can snap and cause you injury.
FAQs
1. Should You Oil a Bow Saw Blade?
Yes. It is ideal to lubricate a bow saw blade with paste wax or gun oil after each use. Wipe off the paste wax after a few minutes on the blade.
2. Can You Sharpen a Bow Saw Blade?
Absolutely. It is important to sharpen your saw blade if it must work efficiently. Use sandpaper, a file, or an electric grinder to get your blades back to life whenever you notice they have become blunt.
3. How Do You Keep a Saw Blade from Rusting?
Keeping a saw blade from rusting has to be a routine process. Always remove wood particles from a blade’s teeth after use, and then wipe it with a moisture-free residue. Also, lubricate the blade after each use, and store it in dry spots.
Conclusion
To enjoy clean cuts and finishes whenever you work with a bow saw, you need to ensure that each purpose’s bow saw is right.
And the one way to figure out the suitability of a bow saw for a task is to measure its blade features.
You also need to know how to fit a saw blade properly before working with it, as your safety and the progress of your work depend on it.
Certainly, this guide will be of good use whenever you need to measure or replace your bow saw blades.
It will also come in handy in answering most of the questions you may have about bow saws.
In the end, you’ll discover that it will help you handle your bow saw correctly, without being an expert with saws.
Related Articles