How do you cut a perfect tiny circle in the paper? So, knowing how to cut small circles on paper is essential. You could need them to create crucial things like a beautiful design or piece of art.
Young children use small circular papers to learn various things like counting and crafting patterns. As a parent, it would help if you knew how to make tiny circular papers.
Read our latest guide about Best Circle Cutters for Paper Reviews.
Small circular papers consist of multiple purposes. They could be for commercial, learning, or recreational purposes.
Whatever the use, you need to make them the right way for optimal results.
Cutting Small Circle in Paper:
Step 1: Determine the Size and Use of the Small Circles to Cut Out
Small circles come in various sizes. Knowing the right size of the holes you want to cut out from the paper will direct you to choose the right tools.
You may not need to be extra careful with the circle’s edges while cutting them for certain purposes, like kids using them to learn.
Small paper circles for serious and professional use should be perfect. An excellent example of such round papers is those used in creating a portrait for commercial use.
All the edges should be smooth, the paper circle should not fold but spread out straight, and should be of the correct size.
Some small circular papers require to be modified to fit their purpose. Whatever the use, know the size of the paper circles you want to cut out.
Step 2: Collect the Required Tools
After determining your paper circles’ sizes, collect all the necessary materials. You will require the following items;
- Drawing compass
- Piece of paper
- Pencil
- Scissors
- Knife
- Compass cutter
- Paper punch
- Clean and dry cylindrical objects similar to the circle size you want to cut
- Undercover materials
Step 3: Set the Paper on a Cover Material
You will need to place a cover material underneath the paper to cut out to protect the surface underneath.
Also, the paper will cut out smoothly when placed on a supporting material. The cover material could be cardboard or more sheets of paper.
Ensure the cover material gets placed on a flat surface for better results. Then place the paper on top, taking caution not to fold it.
Step 4: Draw or Trace Out the Number of Circles You Need To Cut Out
Whether you will draw or trace the paper circles depends on the tools you’ve collected. If you have a drawing compass, first set it to the right circle size.
Then insert a pencil in its place on the compass and start drawing the circles.
In the absence of a compass, you can use a small circular object. Start by placing it at the appropriate place on the paper. Then pick your pencil and draw around its circular shape.
Lift or remove it after drawing. Repeat the procedure until you trace or draw the required number of circles.
Step 5: Cut Out the Circles
After tracing or drawing the circles you want on your piece of paper, it’s time to cut them out. In this step, you may use several tools. It depends on what you have.
If you have scissors, ensure that they are sharp enough. If not, the paper circles’ edges may fold or be damaged.
Then cut out the circle drawn on the paper, strictly following the pencil line. If you deviate from the outline, your circle will be out of shape.
It would help if you took your time when cutting out small circles on paper for optimal results. Avoid doing it in a hurry because mistakes will be inevitable!
For those with nothing else but a knife, you will need to use the right blade. Like the scissors, the knife should be sharp enough.
You can follow the drawn line of the circle carefully with the knife’s sharp edge until you cut out the entire circle.
Alternatively, you may use the knife to perforate the outline. Begin by placing your knife’s blade on the drawn line on one spot and puncture the outline.
Repeat the process on various locations of the circular shape. Ensure the gaps left between punctures are smaller than the punctures.
Then start punching the outline the second time, this round targeting the spaces not punctured. Ensure each punch completes the holes between the gap.
If your hands are not steady, this method may not work out for you. It is a method that requires a lot of caution and care.
If you have the budget, you can opt to buy a paper punch and save yourself all the havoc.
Paper punches come in different shapes and sizes. Go for the one with the kind and size of holes you require to make. It should also fit your pocket.
With the paper punch, you need not draw or trace your circle. The device comes set to cut out circles.
You only need to place the paper punch on the ideal place on the paper and press out the circular form. Continue the procedure until you achieve the number of circular paper pieces you need.
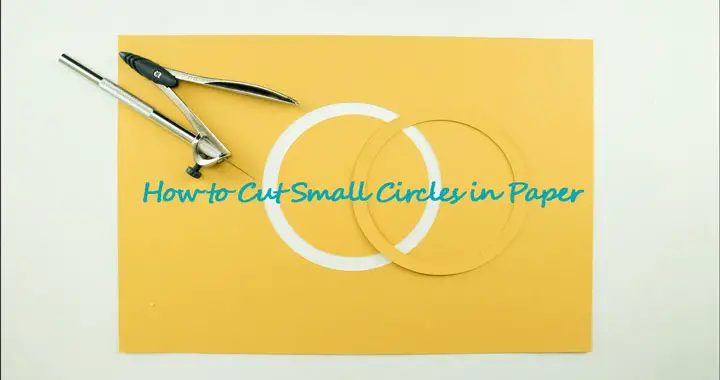
An excellent alternative to a paper punch is a cutting compass. You only need to set this device to the circle size required.
Then place it on the paper at strategic points and turn it around, applying enough pressure to cut out the piece.
Step 6: Collect The Cut out Circular Papers
After cutting the small round pieces of paper, collect and use them as desired. If you are not using them, immediately store them in a safe place.
The circular forms may get damaged or fold if not properly taken care of, making them useless. You wouldn’t want to go through such a process for nothing!
Cutting small circles in a paper may not be challenging, as illustrated above. But if you want to do an excellent job, you should have the following things in mind;
Things To Consider When Cutting Small Circular Papers
- A small paper punch makes the best tiny circle
- The market has various mini paper cutters for cutting small circles
- Avoid exerting too much pressure when cutting the circular papers
- Scissors and knives are not ideal tools to cut tiny circles on paper
- You may not get it right the first time you cut a small circle on the paper, but more practice perfects the art.
- Whatever tool you will use in cutting the paper should be sharp enough.
Conclusion
As illustrated above, small circular papers are vital for commercial, learning, and recreational purposes. What worries many users about these small round papers is how to make them.
Fortunately, as described in the above guide on how to cut a small circle on paper, it is easy.
If you follow the above step-by-step process, you will do an excellent job of creating small round paper pieces for your various uses.
For perfect results, consider the things you need to have in mind, as described above, before carrying out the process.
Your first attempt could frustrate you with shoddy results, but this should not worry you. With practice, you will perfect the ropes of cutting small circles on the paper.
Related Helpful Resources: