Grease guns are essential tools used daily. If you work in a store, manufacturing plant, or garage, you must learn how to load a grease gun without a cartridge. If you have no idea, this guide is for you.
Various moving and mechanical parts often require greasing for better functionality. Mechanics or other users use a grease gun to transfer lubricants or grease to the parts’ application levels.
The tool enables oil or different grease types to reach the inaccessible rotary bearing areas under pressure.
The process of loading a gun for greasing without a cartridge may seem complicated, but it’s easy if you understand how it operates.
It will also be a piece of cake if you follow the following step-by-step procedure to the later.
Loading a Grease Gun without a Cartridge
Step 1: Assemble the Required Items
Some of the items are mandatory to have when loading a grease gun. The first thing to do is to collect everything you require to use in the process. The following are the materials you need;
- A container filled with grease
- A cartridge-less grease gun
- A dust-free, clean piece of cloth or towel
Step 2: Separate the Grease Gun’s Barrel from Its Head
After assembling all the necessary materials for the procedure, you need to prepare the grease gun. It entails separating the barrel from the head. Start by unscrewing the gun head attached to the cap.
You will find the applicator tube and handle connected to the device’s head part. Go ahead and separate them by loosening the grease gun’s double pieces.
Ensure the piston rod inside the barrel is fully depilated. Otherwise, it would be difficult to suck grease using the gun, sabotaging the process.
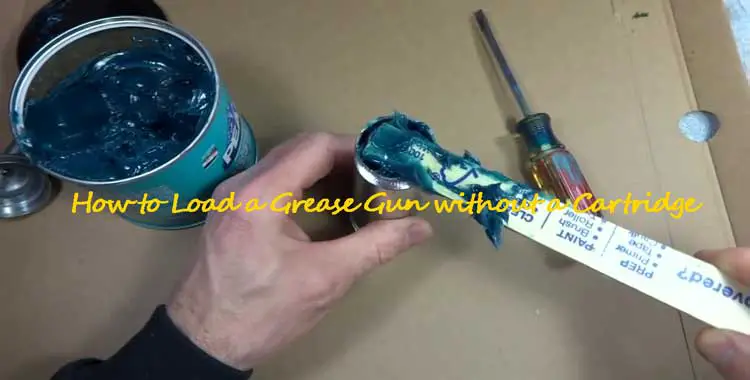
Step 3: Put Grease into the Barrel
When you finish detaching the barrel from the head and ensuring the piston rod depilates fully inside the barrel, it’s time to put grease inside the barrel.
First, insert the barrel’s distal end into the container with the lubricant and keep it down. Then pull the plunger rod to refill the barrel with grease.
If you don’t have an ideal container to put your grease in, get one from any hardware near you. If working as a professional, you can go for large-scale grease containers.
Step 4: Pull Out the Barrel
After filling the barrel with grease by lifting the plunger rod, remove or pull it out from the container.
A lot of lubricants may stick on the barrel. To reduce the stuck grease, rotate the barrel while pulling it out of the grease container.
Then take a clean piece of cloth or towel and wipe out any excess grease around the barrel’s end. Ensure the cloth or towel you use to wipe the lubricant is free of dust.
Step 5: Screw the Grease Gun’s Nozzle
When running the grease gun, you may see some variations. You need not panic when you discover this because it’s normal with these devices.
To prevent this, you need to ensure that the nozzle is screwed on properly. Some guns may require you to screw their end caps on. It depends on the type of grease gun in use.
Step 6: Conduct a Test
After you finish loading your grease gun and reassembling all its parts, you need to test whether it passes grease as required.
Start by pressing the piston rod’s handle correctly until the lubricant comes out through the applicator tube. Wipe out the excess oil from the tube using a clean rag or cloth.
If the grease doesn’t come out from the applicator tube when you press the piston rod handle or has difficulties, then know there’s a problem.
It could be you didn’t load the grease properly to the fill, or you reassembled the grease gun’s parts wrongly.
Disassemble the grease gun as explained earlier and repeat the grease loading process. Then assembled all parts correctly. Ensure no loose part. When through, repeat the test.
If grease comes out perfectly and with ease, you have successively loaded your gun without a cartridge.
For effective loading, there are some things you need to know and keep in mind. To keep you enlightened, check out the following;
Essential Tips about Grease Guns
- Never allow your grease gun to build up enough pressure to destroy the seals of the component getting sealed. Always keep an eye on the pressure build-up of your grease gun to avoid damage.
- When a component goes for an extended period without greasing, the tiny amount of grease left inside solidifies next to the nipple. So when you start oiling such a part, your grease gun builds pressure as the hardened grease blocks the gun’s nipple. After some time, enough pressure builds up to push the solid piece out from the nipple, allowing fresh grease.
- But sometimes, the pressure built can be too much to make the gun nozzle come out through the nipple. It would be best if you, therefore, were keen on the pressure building up. Otherwise, you may end up replacing the nozzle because it won’t be able to take in the fresh grease.
- Keep your equipment greased regularly to avoid grease from solidifying. A sufficiently lubricated component works out great and efficiently.
- Always use the same type of grease in your grease gun and machine parts. Mixing greases degrades the value of the lubricant.
- After greasing, ensure you use warm water to wash your grease gun.
You could still have some pressing questions about loading a cartridge-less grease gun even after the above tips. To help you out, check the following answers to some of the frequently asked questions.
Conclusion
As illustrated above, some grease guns don’t have cartridges and effectively load lubricants on various components.
If you love working with your hands, putting grease in a grease gun can be an excellent DIY home project.
Whether you are a professional or love doing small projects at home, you must learn how to load your grease gun without a cartridge.
Fortunately, the process is easy and fast, as discussed above. For optimal results, you need to follow the step-by-step guide given above to the latter.
You also need to keep the tips explained above in mind before carrying out the process.
Avoid mixing grease as the additives in them may react, weakening them as discussed above.
Confirm with the manufacturer of the equipment or component which lubricant to use.
Some machines and parts come with instructions explaining what grease to use.
Helpful Resources: