Making the best tree climbing spikes is the easiest way to climb a tree. Adventure freaks have a passion for exploring outdoor activities, including mounting or tree climbing.
If you are also into such adventures, you need to crawl a tree at least once. And, that’s why it is necessary to have climbing spikes (spurs) to make the climb as convenient as possible.
Moreover, there are so many options to make your job comfortable, from gaffs to climbing pads. Tree climbing spikes vary in materials between steel and aluminum.
A climbing tree is a skill you must have if you love adventurous activities. Be it in the forest, your home, or anywhere; you must have tree spikes strapped to the lower legs.
Such helpful climbers prevent dangerous climbing situations, especially if there is no assistance from the climbing tree. This guide will help you make your climbing spikes.
7 Steps of Making Tree Climbing Spikes:
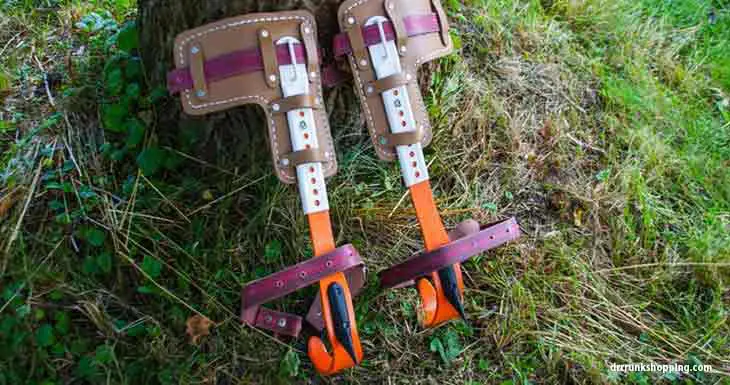
A set of climbing spikes has metal protruding outwards from a booted leg. It enters the bark and inner part of the pulp.
Therefore, helping you support weight on each entered spike and leg when they mount to the desired height
Moreover, measure the length and width of your lower legs and the two areas attached to the spikes.
Make your personalized spikes by adding more features to enhance your climbing experience. But, how can you do it yourself?
Hold on! Here is a complete step-by-step guide for outdoor enthusiasts.
Step 1: Collect Necessary Tools
Let’s start with collecting all the necessary things you are required.
You need L Brackets, an angle grinder with a cut-off blade, pair of pliers, a wrench, compression straps, nuts and bolts of one and a half inches, drill machine with drill bits.
Step 2: Prepare your Climbing Boot
Now, take out the Boot that you will be using for spikes. Measure the width of a pair of L brackets by putting each one on the boot sides.
It will help you see how L brackets will be bolted together. When you measure it in front of the boot area, you can apply strain on your toes and pull it off the boat.
Mark where the bolts connect the overlapping L bracket since the bolts will also work as a spike. You can use combat boot or any boot with the same features.
Step 3: Lock the Two Brackets
You will need four bolts for 4-foot spikes, two for connecting the L-shaped brackets, and the remaining two for locking each side of brackets to assist the outside of your boots
Therefore, use the right size of drill bits and drill one L bracket first as a guide. Then, drill the remaining L brackets in the right spot. Make sure to mark the correct position during the bolting process.
Step 4: Secure the Bolts in L Brackets
When done with the drilling in the center, take out the angle grinder to cut off the unwanted metal pieces. Holes must be clean up and fit accurately.
Now, put the bolts in L brackets holes. Secure the nuts by using pliers and a wrench when screwing the bolts.
Step 5: Insert the Strap
Put the strap in the right position as it will connect the spike to your Boot.
Place the L brackets exactly above the ball on your foot. Estimate how far you can tighten the strap to the Boot.
In case of a large Boot, strap it down.
Again, take out your grinder and cut a pair of slots on all sides of the L bracket. Place the strap on the slots on one side of the L bracket as soon as slots are drilled.
Moreover, insert the strap on the upper slot, moving outwards and down to the lower one. Continue inserting it to the other side of the bracket and fit the belt.
Remove the excess straps and ensure that the remaining straps fit perfectly with your leather boots.
Step 6: Adjust the Climbing Spikes to the Boot
After fitting the strap, it’s time to fit the climbing spikes into your boots. Bring the Boot and set the position of the spike the way you like it.
It should be comfortable to your toes and lower legs. It is recommended to place spikes in front of the stitching when you tight the spikes to both sides of the boots.
Minimize the excess straps, and don’t forget to tight them. It will make it tight and strong enough that it will not be removed from the shoes.
Step 7: Sharp the Bolt into A Spike
The last step of making tree climbing spikes involves sharpening bolts to change them into an actual spike. You have to take the angle grinder along with the angle blade to do it in a few minutes.
Be sure to do your job nicely and mark the section of cut with a pencil. Afterward, cut the excess straps off.
However, leave behind an extra piece of length for any adjustments in the boots.
Continue the procedure of making climbing spike to another side of the shoes as well.
If you follow these steps nicely, you’re good to go.
How to Fit The Climbing Spikes to The Boot?
First of all, make a spike or if you have already on, then learn how to adjust the tree climbing spikes with your boots. Here are easy steps to fit the climbing spikes to the Boot.
Position The Spike
Take the Boot and place the spike as you want it to be. It would be best if you put it most comfortably so that your toes feel relief.
Tighten The Spikes
As you have placed it, now secure the spike to both sides of your climbing boots. Remember to put spikes in front of the stitching. The more you tighten the spikes, the more you are safe.
Remove The Excess Straps
You should secure down the climbing spikes and minimize the excess straps. Make it firm enough so that it will not be separated from the Boot.
Moreover, keep an extra length for any possible adjustments in the boots.
If you follow these steps, you can quickly put the spikes together with the boots. However, for more clarity, it is advisable to watch a tutorial.
FAQs
Do Tree Climbing Spikes Damage Trees?
Yes, climbing trees with spikes can damage a tree as it creates holes in the tree. Many people argue that climbing with spikes is quicker and less costly.
However, these holes can ruin some of the vital tissues of trees. Sometimes, the wounds in the cambium can promote the development of unwanted shoots like water sprouts.
In addition, you can also transfer diseases from an infected tree to a healthy one.
Therefore, using climbing spikes can be beneficial in the short run, but it can do irreplaceable damage in the long run.
How do you Sharpen Climbing Spikes?
Used climbing spikes can become less sharp sometimes when they hit something hard. You don’t need a super sharp from all sides, just not blunt.
You can take the spikes off and sharpen them using a flat chainsaw file. Also, the use of an angle grinder in a nice way can speed up your job.
Wear leather gloves to hold them tightly and keep you filing your fingers.
Helpful Guides:
- https://www.drrrunkshopping.com/best-arborist-helmet-for-tree-climbing/
- https://www.drrrunkshopping.com/best-climbing-sticks/
Conclusion
Learning how to make tree climbing spikes by yourself is a useful skill. It will help you quickly crawl on the trees without any danger.
Start with preparing your climbing boots and connect the L-shaped brackets. Tighten the bolts and insert the strap at the center carefully. Make sure that your straps fit perfectly with your shoes.
Then, place the climbing spikes in the boots tightly to not be separated from the boots. Lastly, sharp the bolts with the grinder and turn them into a spike nicely.
The above method is an easy and affordable DIY method to make tree climbing spikes at home.
Such activities will inspire and excite you at the same time for your climbing adventures.
Use your spikes with care and replace them when they wear. Also, quench your thirst by watching some helpful tutorials about making tree climbing spikes solely.