Emergency lights are necessary for every building, including homes. Normally, you will open the emergency lighting system when it fails to function properly.
It could be the emergency light cover is damaged, batteries are dead, or the bulb is not functioning properly. Once you open the system, you should troubleshoot to identify the issue.
However, during the moments of emergency, you can help the situation with ease. You just need to know the basics and the accessories needed as well as how to remove emergency light cover.
The following is a guide for removing and replacing the emergency light covers:
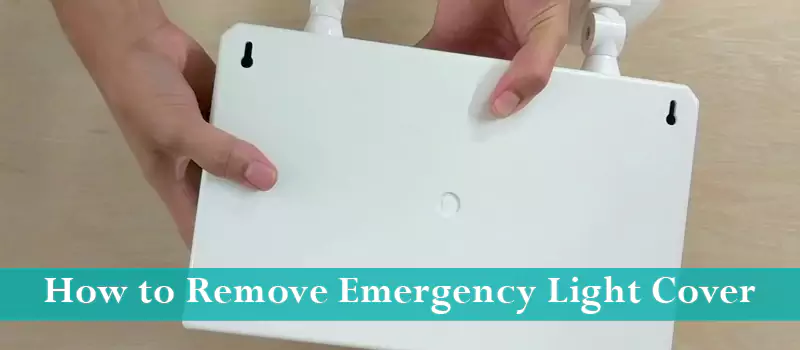
How to Remove Emergency Light Cover
The light covers are transparent shields that keep the emergency lighting system protected from flying objects or vandalism. Here is the process of removing the emergency light cover:
Step 1: Get the Tools Ready
Have all the necessary tools of work-ready. Tools that you will require for the emergency light removal include a ladder, safety goggles, a flashlight, a screwdriver, an emergency light cover replacement, extra batteries, extra bulbs, and other necessary tools.
Step 2: Keep the Lights Off
Turn off the emergency lights before you start working on them. Switching off the lights before you begin helps prevent further damage to the system.
With a screwdriver, gently open the emergency light cover. Understand the features and the layout of the lighting system before you open it.
However, most of the systems have similar ports and features, so it is easy and straightforward to open it.
Step 3: Remove the Cover
Take off the light cover and place it in a secure position to avoid damage. The inner system of the battery is exposed and you will be presented with a lot of wires. Don’t freak out, this is normal.
However, do not interfere with the wiring system. If the maintenance requires some work with the wires, it is best to use the services of a professional electrician. Some of the wires connect to the battery circuit.
After lifting off the cover, you will see the location of the battery.
Step 4: Identify the Position of the Batteries
In most emergency lighting systems, the batteries are located in a space just above the word ‘exit’. If the system you are dealing with is different, you can still easily locate the batteries.
Step 5: Check the Types of Batteries
The emergency systems are designed by different manufacturers hence are not always the same. Your emergency battery type may be either a Nickel Cadmium (NiCd) or a sealed lead-acid (SLA).
If the batteries look similar to baby car batteries, it is SLA. If they look like normal household AAA batteries, they are NiCd.
The batteries are safely held in place by a shrink plastic wrap. You need to remove the batteries gently.
Step 6: Replace the Batteries
Now, you need to remove the old batteries and replace them with new ones. The old batteries are easy to remove. Most batteries will easily come out when you remove the lead from the + and – contact points.
However, some of the batteries are differently fixed and you will require a harness to remove them. Check the voltage of the batteries.
If you intend to replace the batteries during the maintenance routine, check the battery requirements beforehand. It will make purchasing the replacements easier and faster.
Step 7: Use the Right Voltage
Note that the emergency light batteries have a voltage of either 6V or 12V. Do not use the 6V batteries in the 12V emergency light or vice versa.
The wrong choice of batteries may cause a short circuit or cause the emergency lights to malfunction. To know the voltage or type of battery, check the labels on the inside housing of the batteries.
After replacing the batteries, plug the new batteries into the wire harness, or snap the batteries on the leads.
Step 8: Check for Other Issues
The batteries of emergency lights can last for up to five years. If the batteries are functioning well, then you should look for other issues. Another common issue you might need to fix is the emergency light bulb replacement.
Step 9: Ensure the Emergency Light Cover is in Good Condition
Once you have identified the issue and changed the batteries or the bulb, you can take the emergency cover.
If during the emergency light removing you damaged the cover, then you should consider changing an emergency light cover.
When opening the emergency lighting system, always have a spare battery, bulb, and light cover.
Step 10: Replace the Cover
Consider emergency light cover replacement if during the takeoff light cover got damaged or broken.
Step 11: Test the Lights
When replacing a new emergency light cover, gently screw it back to avoid breakage or damage.
Once you have replaced the batteries, the bulb, and the cover, you should test if the emergency lights are working.
Finally, test the lights. Press the test button to ensure the lights are working properly. If they are not working properly, start the process again. Alternatively, you hire a professional electrician.
Also Read:
Conclusion
As you can see, emergency lights should be in good working condition all the time. Every area where there are visitors coming in should have an emergency lighting system. It keeps the building lit after a power outage.
Replacing the emergency light cover and the batteries is easy and fast and does not necessarily need an electrician.
You do not have to possess electricity wiring knowledge.
The bulb is the major feature of the emergency light. But the emergency light cover keeps the bulb protected from external elements that might interfere with its proper working condition.
It is important that you know how to remove the emergency light cover and replace it. The above steps will help you to replace the emergency light covers and other parts of an emergency lighting system.