Recessed light, AKA pot light/downlight, is set inside the wall or ceiling, creating a low-profile design.
It has a small trimmed section to emit light, while the rest of the setup is concealed inside the ceiling to create a minimalistic look. It creates a downward light concentration with a narrow spotlight.
However, the light can fade as it gets old, and the housing has to be changed. So, how to remove old recessed light housing?
Detaching recessed light housing is very easy, but you might want help if the fixture is too high for you. The removal process can vary a bit depending on the attachment method & housing type.
Regardless, there are certain steps you need to follow thoroughly to remove old recessed light housing safely.
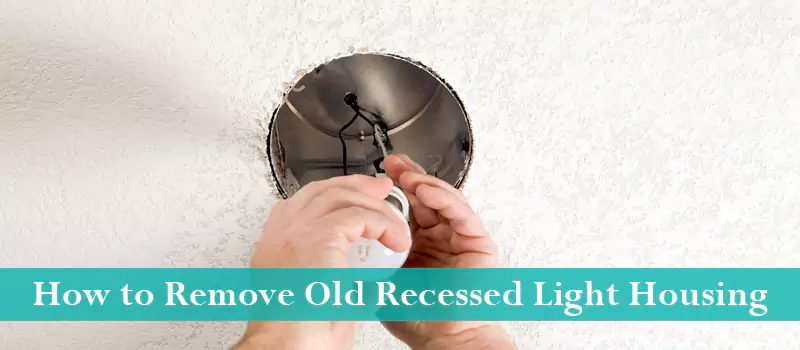
How to Remove Old Recessed Light Housing
You would know that your recessed light housing is old if it has a yellow tint with a faded light. Before you start the process to remove old recessed light housing, you need to have the following tools.
- A Ladder: To reach the recessed light with ease
- Manual Screwdriver: To unscrew the bolts
- Drywall Saw: To dislodge the casing
- Voltage Tester: To ensure the light doesn’t have a current flow after being switched off
- Tape Measure: To measure the section if cutting is required
- Pencil: To mark the area
- New Recessed Light Housing: To replace the old housing with
- Dust Mask: To ensure the dust doesn’t get to your nose or lungs
- Eye Protection: To ensure dust doesn’t get into your eyes
Now that you have the necessary tools and materials for removing old recessed light housing, follow these steps.
Step 1: Turn Off Your Electricity Supply
Safety is always the first priority when you are indulging in any task that involves electricity. So, start by switching off the power supply to the light fixture.
Make sure you switch off both your circuit box and wall switch before removing the old recessed light housing.
Additionally, you also need to check if the wires still have any current supply due to any faulty wiring. Use the voltage tester for this purpose.
If the test shows positive for current even after you have switched off your main supply, seek a technician’s help. This would ensure that the process is safe for you.
Step 2: Remove Your Old Recessed Lighting Fixtures
This is the major part of the process for removing recessed lighting housing. You need to use the best-quality equipment to get this job done safely.
Although you don’t need a lot of tools, having the right ones is important to change out old recessed lighting.
The first thing you will need is a step ladder. Even if your ceiling is low, having a step ladder can be helpful. Before you start out, wear your safety gloves, dust mask, and goggles.
Doing this protects you from drywall dust falling into your eyes as you replace recessed lighting.
Step 3: Remove the Trim
In order to change out the ugly recessed lights, you need to remove the inner fixtures first. This fixture is termed trim.
Make sure the light has been shut down for a long time and the surface is cool to work with. Next, remove your light bulb.
There are 2 variants of recessed lighting trims. Your trim fixture could be a spring-loaded or screw-in variant. The process to remove one is slightly different from another.
If yours is a screw-in trim, just turn the screw in a counter-clockwise direction. It will loosen & all you need to do is simply release it.
For a spring-loaded trim, the key is to use a screwdriver. Simply place your screwdriver between the ceiling and the trim.
Now, slowly bring down the screwdriver & the trim would automatically come down and release itself. While you do this, make sure you don’t damage your ceiling in the process.
Your ceiling trim might also have clamps that would be required to release it completely.
Now that you are done releasing the trim, move over to the next step and remove the housing can.
Step 4: Remove the Light Housing’s Can
As the trim comes off, you can see the can section of the housing as you change out the ugly recessed light. Remove the entire thing from your ceiling.
To do this, you would need your flathead screwdriver. You will notice four black metallic strips on the can’s walls.
Somewhere on these black strips, you will notice the presence of a notch. They could be located anywhere, but they can be found with ease as you remove a recessed light can.
Place the screwdriver on this slot and apply gentle pressure to release the clamp. Repeat the step for all four of the clamps.
Once you are done, slowly remove this light can from your ceiling. Ensure that you are careful as the wiring would still be attached with the can.
If there are any connectors or electrical tapes on the wires, remove them with caution. Once you are done, the can would come off.
Keep it aside and bring your new can after you remove the can light from the ceiling. If you do not plan on replacing the housing right away, ensure that you tape the electrical wirings.
Also, place a tape on the breaker to ensure it doesn’t turn on automatically. If you are replacing the housing right away, the pointers above can be ignored.
Replacing the casing right away would save you a lot of extra effort.
Step 5: Install New Light
Once you remove old recessed lighting, start installing a new one. First, start by attaching all the wires with your new can.
The process is very simple. Attach the wires in the same way as you saw it with the old can. You can also use some connectors to ensure that all the wires are right in place.
After the wires are safely connected to the can, simply push it back into its hole. The clamps should activate automatically & lock the can in its place.
If the new can is bigger in size, you might have to cut a hole. For this, you would need a drywall saw and a measuring tape to get rid of recessed lighting.
Start by measuring the portion that needs to be sawed off. Now, use the drywall saw & cut off the required portion to make the hole bigger.
Make sure you double-check the measurements before initiating the cutting process for recessed lighting removal.
Alternatively, if the can is smaller, you can fill this gap using a small fixture. For a smooth transition, make sure you get a lighting can of the exact same size.
Now, all you need to do is put everything back in place, including the light bulb and trim.
How Do You Remove Recessed Lighting Without Attic Access?
Not having access to the attic for recessed lighting removal could add to your problems.
Luckily, there is a way to change the light’s housing without the need to access the attic. However, before you start, ensure you have all the essential materials to remove the lighting fixture.
You can use the very same materials as described earlier in the guide to replace old recessed lighting. Because you don’t have access to the attic, you need to sketch out an accurate plan.
Step 1: Switch Off the Power Supply
Regardless of how you plan on proceeding with the removal process, switching off the power supply is a must.
This will ensure that you are safe and secure during the replacement process. Switch off the buttons connecting to the recessed light and then shut down the main supply.
Next, you need to drill into the ceiling and remove a portion of the ceiling to access the light fixtures.
Step 2: Drill a Hole in the Ceiling
Measure out the area that you plan to cut through with a drywall saw and gently cut off the same.
Make sure you wear your safety goggles, gloves, and mask to avoid dust from entering your nose or eyes. Once you successfully drill through and see the fixtures, start unscrewing the same with your screwdriver.
Now, you can either push the can in the upward direction or pull it towards yourself. It would entirely depend on how much room there is within the ceiling to get rid of recessed lighting.
Step 3: Remove the Wirings
Slowly remove all the wires that are connected with the recessed light housing. But, before you do that, use a voltage tester to check if the wires still have any power supply.
If not, start removing the wiring from the recessed lighting can.
Step 4: Replace the Housing
Once you have completely removed the wiring, simply pick the old recessed lighting replacement and attach it to the wiring.
Next, push the casing back into its place and tighten all the screws effectively. Finally, patch in the hole with the drywall pieces.
Related Guides:
Conclusion
This complete guide will help you get rid of recessed lighting that has surpassed its lifespan. You also need to understand that safety comes first.
When working with electrical fittings, it is important to be accompanied by someone to help you out. We hope by now you have learned how to remove old recessed light housing.