Lightbulbs make great decorations that you can decorate your house or make lightbulb sculptures. You can easily take apart lightbulbs, and place cool objects inside.
Have you ever wondered how to make a hole in a lightbulb without breaking or shattering the glass? Making a hole in a lightbulb is safer and easier than you might think.
You don’t need any complicated tools, and it only takes a few minutes.
In this article, we will run you through the step-by-step process for drilling holes in lightbulbs, and how to take a lightbulb apart.
Making a Hole in a Lightbulb Without Breaking
There are a couple of ways that you can go about doing this. You can use a diamond drill, this is a slightly more complicated process.
It takes a little longer, and you are going to need a few more things before you can get started.
- 100-watt bulb (best to use because it won’t overheat as easily as a 40 or 60-watt bulb).
- Safety glasses.
- Heat-proof gloves.
- A butane blowtorch.
- A sturdy surface (a metal tray turned upside down works fine).
Step 1: Ensure Your Safety
Make sure that you have your safety glasses and gloves on. You can pick these up from a hardware store, or online.
The lightbulb is going to be very hot after you apply the blow torch.
You want to be cautious and handle it with care. The safety glasses are important in the event that any shards of glass fly up into your face.
Step 2: Prepare the Area
Clear a table or workbench, somewhere with no clutter and lots of space. Place the metal tray on the bench, and put the lightbulb on the tray.
Step 3: Make the Hole
Take out the butane torch and hold the flame just above the bulb. The middle of the bulb, where it bulges out, is the perfect place to put a hole.
Make sure to hold the torch steady. You want the flame concentrated over one spot on the bulb. You should see a glow in the spot directly under the flame.
This is the heat from the torch acting upon the globe. It will be very hot. After a few seconds, you should hear a popping sound. A neat hole will appear in the bulb.
Turn the bulb over and repeat for the other side. Make sure that the second hole is as closely lined up to the first hole as possible.
Latest Guide: 3 Steps to Wire a Truck Cap Dome Light
How to Put a Hole in a Lightbulb without a Torch?
First, make sure you have all the right equipment and tools. You are going to need:
- A diamond drill with a drill bit (a 9/16 inch, or 14mm diamond drill bit is a perfect size).
- A bucket of water.
- Something to hold the bulb in place.
For the last item, a pair of metal tongs should be fine. You can also make a small wooden holder that you can set the bulb in.
Step 1: Place the Bulb
Place the bulb in the water. Make sure the bulb is steady and in place. You don’t want it to be moving around.
This can be dangerous, and you won’t get a good neat hole. You also don’t want to drill a hole in your hand.
Step 2: Start Drilling
Place the drill just above the bulb. Keep the bulb below the water. The inside of a lightbulb is a vacuum. Keeping the bulb in the water acts as a counter vacuum.
This will help to keep the bulb from breaking by reducing the amount of air that enters.
The drill should be running at 100 RPM. This is a light enough pressure but will ensure you get a neat hole. Slowly and carefully drill a hole in the glass.
Step 4: Drill Outside
Turn the glass over and repeat the process for the other side. If the glass breaks, try again until you get it right.
Also Read: How to Wire a Doorbell from a Light Switch
How to Open a Light Bulb without Breaking It?
This is an easy thing to do once you get the hang of it. As long as you follow all the steps, and use the right tools, it should be a piece of cake. You are going to need:
- A lightbulb (obviously).
- A pair of small pliers. They need to be small enough to remove the small metal cap from the bottom of the bulb.
- Safety glasses.
- Gloves.
- A clean work surface.
Step 1: Hold the Bulb
Hold the bulb gently in your non-dominant hand. You want to hold it from the end. Don’t hold the bulb itself because you might accidentally squeeze it.
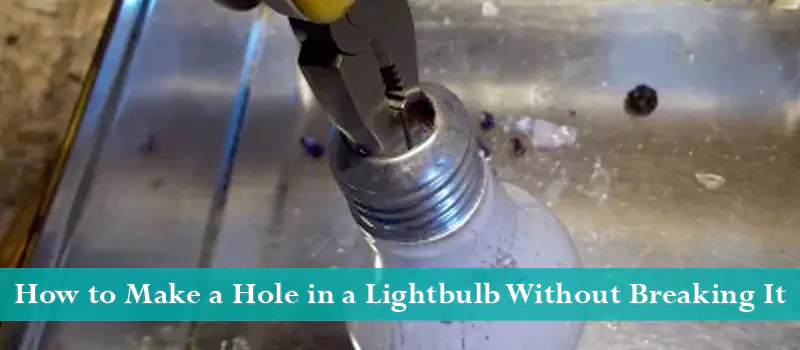
Step 2: Peel off the Cap
Holding the pliers in your other hand (your dominant one) gently try to lift, or peel off the metal cap.
It might take a while. You will need to concentrate and be patient. Make sure there is nothing to distract you while you do this.
Step 3: Remove the Filament
Once the cap is peeled off, give it a little twist. The cap is connected to the filament in the bulb. Give the cap a twist and a pull to remove the filament from the bulb.
Step 4: Open the Bulb
This step is tricky and dangerous. This is where you should be wearing glasses and gloves if you aren’t already. You need to remove the black bottom of the bulb.
This is technically glass, so it can break and cause injury. Use the pliers to pop it out of the bulb and clean all the glass. By doing so you can open the light bulb.
Conclusion
Making sure you have the right safety gear is the most important part. You don’t want little shards getting in your eyes. Be careful using the blowtorch as well. You want a good pair of gloves when handling the bulb.
Make sure to have a good, clean workspace. And make sure to keep children and pets away while you work.
Now that you know how to make a hole in a lightbulb, and how to safely take one apart, go and get an old bulb, and try it for yourself.