So, how to make a paracord lanyard? Paracord lanyard secures pocket knives and keys. Making one entails weaving one or two strands or cords.
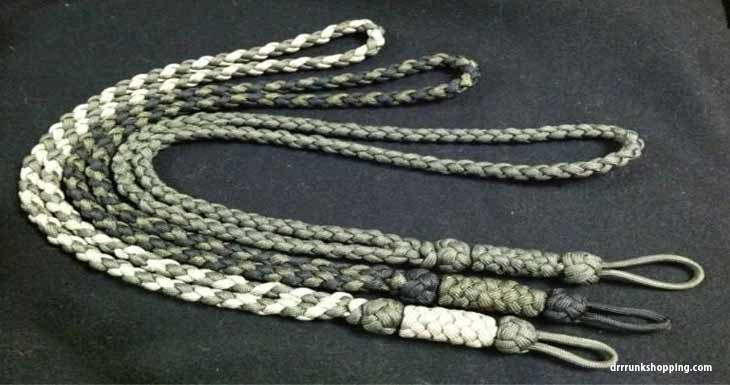
When using two strands, you can combine colors to make the paracord lanyard attractive.
The method you choose depends on your preference. When done the correct way, the outcome is a robust, beautiful Paracord Lanyard.
If you have never made one before and are searching for how you can do it, the following paracord lanyard instructions for complete beginners will help you.
Steps of Making Paracord Lanyard:
Step 1: Collect the Necessary Materials
For optimal results, you need to have the necessary items for making a paracord lanyard. The following list will help you know what you require;
- A 550 paracord, approximately four meters or 13 feet
- A tape measure or ruler
- Scissors
- Metal clip
- A piece of paper
- A Rubberband, string, wire, or chewing gum
- Lighter
Step 2: Identify and Mark the Paracord’s Center
Now that you’ve gotten all the materials you require, the first thing you’ll need to do is to identify the center of the paracord you are using.
It is essential to use a long paracord to avoid running out of it when weaving.
That’s why we recommend using a 13 ft. cord in our instructions. Another reason we advocate for the use of 550 paracords is; its diameter is approximately 1/8 – inches to ¼ – inches (4mm).
Have you ever seen a nylon shoelace? It feels and looks like one.
If you use thicker cords, the lanyard produced would be chunky. Using the 550 paracords is better. Fold it into two and mark the center.
You can use anything ideal to tie around the center as a way of highlighting it.
Some of the best items to use are a short string, rubber band, chewing gum, or wire. You can be creative in what you use to secure the cord’s center.
Step 2: Make a Lanyard Knot
After marking the center, it’s time to tie down a lanyard knot. It is also known as a knife or diamond lanyard.
Have you ever seen the knot on the Scouts’ wood badge woggle? This knot looks like that.
The best way to learn how to tie the lanyard knot is by using a piece of paper. It may seem traditional, but it works wonders in enabling a new student to learn the art fast.
The importance of using paper is to hold things in place. As a result, your hands become free to make the knot.
You’ll have to start by piercing two holes a few inches apart from each other on the piece of paper.
Then take the two loose ends of the cord and insert them through the holes, each hole for each paracord bit. Insert the ends from below the paper.
The loose ends will appear on the upper side of the paper, a few inches apart. Straighten them to lie parallel to each other on the paper.
You will have one loose end on the upper side of the paper and the other one below.
Take the bottom piece of the cord bit and twist it away from you to make a loop using your right hand.
Then take the loose upper cord end and run it underneath that loop. The result will be something similar to an eyeball with a pupil.
Then continue running that top loose end underneath the other loose end and direct it down into the eyeball underneath. Next, pull it up.
You will have formed the intricate knot pattern, but you need to tighten it up slightly.
Take the code piece from the bottom of the unfinished knot and take it around the top. Next, pass it past the point where the code comes out through the top hole.
Then pass it under everything and up through the center gap. Next, take the other loose code and pass it through the bottom past the point where the cord comes out at the bottom hole.
Like the other loose end, continue by making it pass underneath everything and up through the center hole.
At this point, you can get rid of the paper by sliding or tearing it away. Then slowly and gently, pinch the formed knot tighter.
Work it through all the ends and the loose parts until you gradually tug on it. Then pull on the loose bits. Voila! You have successfully made a lanyard knot.
If you want to make the knot smaller, tighten it by pulling the cord gently through the knot. It is similar to how you draw your shoelaces.
You can also use two cords to make a lanyard knot, which will get referred to as a double knot. The two ropes usually get used as one. What you produce is a good-looking and neat double lanyard knot.
After making the knot, the loop should measure approximately 2 – inches or 5cm. Also, the cord center you earlier marked should lie on the loop’s end.
After that, you can now get rid of whatever you marked the cord’s center with after achieving the right loop size and positioning it correctly.
Step 3: Compute the Lanyard Length
After finalizing the loop, you need to measure the length of the lanyard. Otherwise, your paracord lanyard may be too long or short, making it hard to handle.
Start by taking your metal clip and passing the cord’s loose ends through its loop.
Pull the two cord bits until you arrive at a distance of 12.5cm or 5 – inches between the metal clip and the lanyard knot.
Sometimes the metal clip may be too spacious, making it hard for the cord ends to lay flat after passing through its loop.
As a result, it becomes difficult to measure the lanyard length. If that’s the case with your metal loop, poke the code bits twice through the circle of the metal clip.
Step 4: Make a Cobra Stitch
After achieving the required lanyard length, weave the loose ends. You do so by making a cobra stitch. The process is easy.
All you need to do is to take the loose end from the left and fold it across the top to the right.
Then take the other right loose end and fold it over the top of the other loose end that you just folded across.
Next, pass it behind everything, then up through the loop on the left.
When through, tighten it up. Continue by making another cobra stitch but in the opposite direction.
Take the loose cord on the right and fold it across to the left. Then take the left cord bit and pass it over the top. Next, pass it behind everything and up through the loop on the right. Follow by tightening it up.
Continue alternating the loose ends like so after every stitch until you make 11 stitches. Avoid making tight stitches as they will make your lanyard stiff.
Step 5: Make the King Cobra Stitch
After finishing with the cobra stitches, make another layer of cobra stitches to make your lanyard sturdy.
That other set of stitches is known as king cobra stitch. The process is easy because it’s like the cobra stitch. The only difference is that you make it on top of another cobra set stitch.
After finalizing the regular cobra stitch:
- Look for the loose end that has just gone under the loop.
- Take it over the top.
- Take the other loose end and pass it over that cord.
- Then pass it around, behind, and up through the loop.
- Tighten it.
- Swipe sides and repeat the procedure until you reach the metal clip.
As you continue making the cobra stitch, you will discover that the stitches naturally fall in the cobra stitches’ gaps.
Step 6: Securing the Loose Ends
The king cobra stitch is the last thing to do on the lanyard. You will need to get rid of the remaining loose ends.
Take scissors and snip them off, leaving approximately 5 mm or ¼ – inch of each end poking out.
Then light a lighter and melt the poking ends. Wet your finger or use a knife to press the molten ends. It will prevent them from fraying.
As you press the burnt ends, they form a mushroom-like shape that prevents them from working loose.
After securing the loose ends, you will have successfully made your first paracord lanyard!
As illustrated above, making lanyards is not a hard nut to crack. But if you still have some queries regarding the process, the following answers to frequently asked questions will help you out.
FAQs
1. How Do You Calculate the Length of a Paracord?
It’s easy; if making for your keys or pocket knife, measure the distance from inside your pockets to where you will secure them on your garment. Use a ruler to measure the length.
The same case applies to a paracord for making bracelets. The rule is; one paracord foot is equivalent to an inch of the lanyard or bracelet.
2. How Many Feet of Paracord Do You Need for a Lanyard?
As explained earlier, you will require a paracord long enough to finish making the lanyard. If it’s short, let it not be below 6 – feet. Otherwise, a paracord of approximately 13 feet would work out best.
It depends on the size of the lanyard you want.
3. How do you Secure a Paracord End?
As described earlier, you will need to cut the loose ends and leave approximately 5 mm of them protruding. Then melt down the ends using a lighter.
Next, wet your fingers or use something reliable like the metal part of a knife or lighter to press the burnt area to seal the ends off.
After they cool down, you will have successfully secured the paracord ends. They won’t fray or run out.
Conclusion
As explained in the paracord lanyard instructions, making a paracord lanyard is easy and straightforward. You only need to use the right materials and correct procedure.
But some people may not get it ideally in their first attempt. It doesn’t mean that the process is complex. You only need to practice to perfect the art.
Also, pay attention to details like using the correct cord width and length. Otherwise, you may end up with a chunky or unfinished paracord lanyard.
You can also vary the lanyard colors by using two strands of different colors.