Construction workers run into challenges using a palm nailer for projects because of their similarities with a nail gun.
New owners continue to wonder how to use a palm nailer without power supply, capacity, and other operations-related issues.
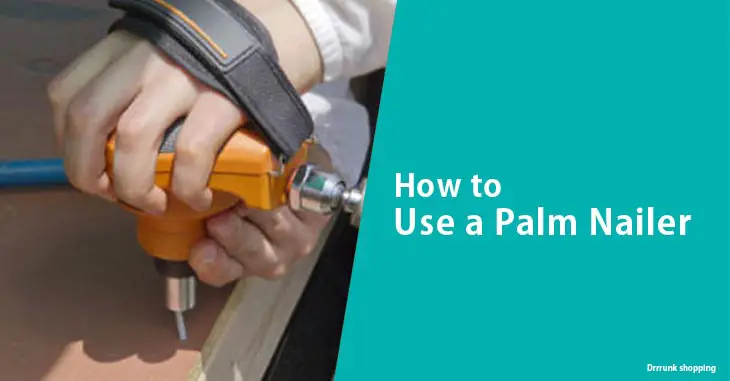
Palm nailers are versatile pneumatic tools with exceptional power and operating pressure to drive nails at lightning speed with great precision.
It usually comes with a strap to give your hands leverage and avoid slipping under heavy usage. Using this tool for your project is time-saving, improves work efficiency, and enhances productivity.
This tool is exact with a lightweight design, ergonomic grip, powerful motor, and Anti-Swirl technology.
It is an ideal replacement for hammers because it can drive nails quickly, safely, and accurately into your DIY project material with ease.
Also, read our complete guides:
Whether you’re an industry expert or construction worker using a palm nailer, this powerful tool can quickly become your favorite.
How to Use a Palm Nailer
Using a palm nailer for construction or industrial projects is a challenge but a learning curve for beginners.
It is advisable to read the manual and put security measures before using the tool. The device uses compressed air or electricity to drive nails smoothly and efficiently.
This step-by-step guide will help you understand the process of using a palm nailer without running into capacity, power, and operational issues.
You’ll figure out the machine’s nailing procedure and how to power the device, how to strap it down, and positioning.
After understanding the operational concepts, you’ll comfortably thrust a nail with accuracy, save time and improve productivity.
Step 1: Read the Manual
After purchasing a palm nailer for your projects, your first task is unboxing and reading the manual.
Get familiar with the device by going through the manual because understanding the tool’s mode of operation is vital before usage to avoid unnecessary accidents.
Manufacturers explained the ins and outs for you to understand the tool and refer back in the face of any difficulty.
It is worth noting that many users tend to forgetfully or intentionally ignore this advice, which is risky.
If you’re not willing to learn how a machine operates before using it, stay away from a palm nailer.
It would be best if you had a thorough understanding of the machine before you swing into action.
Step 2: Safety First
The small piece of machinery can make loud noise while in motion, making earmuffs an essential safety component.
If you cannot find earmuffs in the machine pack, consider investing in a pair to prevent the noise from your ear.
Hand gloves are another vital safety tool protecting your hands from fatigue, especially if you’re working for a long time.
Earmuffs and hand gloves are ideal tools that help you retain steady pressure while working.
If your palm nailer functions with an air compressor, there is a high chance you’ll encounter both problems, and these tools will keep you safe.
Palm nailers with a one-gallon compressor do not emit pulsating noise, but you cannot count on the nailer when it comes to noise.
Step 3: Strap it down
After understanding the machine’s mode of operation, it’s time to strap it down. Palm nailers usually come with straps, so put your hands into the strap.
The strap is at the top of the tool. Tighten the strap to your hands until there is a reluctance.
Ensure that you have adequate resistance and do not squeeze or constrict your hands.
What you need is enough resistance for your hand to accommodate expected vibrations.
Step 4: Power up
There are different power nailers on the market, but if you purchase a cordless or battery-powered machine, find the start button and power up.
Before powering the machine, you want to check the battery. Ensure you do not have a bad-quality or old battery because it will affect the device’s performance.
Palm nailers without a cord are less powerful, so using the device with a bad or old battery jeopardizes its efficiency.
However, you can start corded tools by plugging them into an air compressor and focusing on the positioning.
Step 5: Right Posture
Placing your focus on the positioning is critical, especially when you need to apply a slight force while nailing.
Most users are comfortable lying or bending while working with the device, but getting in the proper position streamlines the process.
If you want to achieve success using a palm nailer, you need to stand or sit slightly facing the other way from the machine.
Furthermore, hold the tool firmly and ensure the nose faces out before you start driving nails. Position your nail at the top of the wood and exert a little force to drive the nail.
It is also an effective strategy if you’re working on a ceiling or small construction project.
Some palm nailers come with a pressure button for users to press while driving nails into materials.
Step 6: Nailing Procedure
Another critical factor in understanding is your machine’s nailing procedure. Your first task is adjusting the nailer’s nose to fit the required nails for your project.
It is a manual process, so use your hand to place the nails in the magazine before usage.
In addition, ensure that the magazine holds the nail firmly over the magnetic tip to avoid unexpected accidents.
It’s time to place the tool on its drive location and exert a little force, and it should pound into the materials for a refined finish.
If you’re working with a block of wood, now you can drive nails with comfort and efficiency.
It is an exceptional tool that comes in handy for construction, industrial, or DIY projects.
After driving the nail into your material, some part of its head remains above the surface.
The best way to solve that problem is to complete the job with a hammer. The tiny space comes with an added advantage if you want to hang little things.
Palm Nailer Usages
Palm nailers are exceptional tools designed to complete the unfinished jobs of nailing guns. This tool takes the place of hammers and executes their function comfortably.
The tool can serve different purposes such as fencing, framing, construction, decking, and lots more. There are various uses of the machine, and we will discuss a few below:
Drive Bulk Nails:
Palm nailers are versatile tools that can drive bulk nails into project materials with ease.
Most nailers can drive small and large bulk nails of similar size and joist hanger nails because of their unique qualities.
It is advisable to place the nails in bulk by hand into the magazine. This tool drives collated nails with efficiency, unlike traditional framing nailers.
Ideal for Close-Fitting Spaces
You can perform various nailing projects with a corded or cordless palm nailer with ease.
These machines come with a compact and lightweight design ideal for close-fitting spaces such as ceilings, corners, edges, and lots more.
Think of this tool as a mini husky tiny nailer ideal for projects like frame decking, fencing, and pole barn construction.
Using a mini palm nailer with accuracy will also enhance your productivity on DIY projects. Keep in mind that positioning is critical to the success of your project.
Palm Nailer Safety Measures
There are security measures to put in place before using palm nailers for your construction or fencing projects.
These powerful tools are versatile, efficient and come in handy for new owners and professionals.
Palm nailers make loud noises while in use, and you’ll need to protect your ear and hands from unexpected accidents.
Earplugs
The first security measure to consider is a pair of earplugs. While these machines are different in operations, they emit loud noise.
Consider investing in earplugs for your safety. Palm nails can make pulsating noise while driving nails into materials, and your earplugs will protect your ear.
Hand gloves
After unboxing your palm nailer and understanding the operational concepts through the manual, consider protecting your hands before swinging into action.
Hand gloves are critical safety tools protecting your hands from fatigue, especially if you’re working for a long time. Another factor to consider is a helmet. Get a compact helmet that can shield your face from debris.
Hand gloves, helmets, and earplugs are essential safety tools required for every new or experienced palm nailer user.
It is also advisable to go through the machine’s manual before operating it.
It is vital because you need to understand how the machine works before using it on materials.
Difference between a Pneumatic Palm Nailer and an Electric Palm Nailer
Palm nailers are exceptional tools with adequate operating pressure and power to drive nails with speed and precision.
You will find various types of palm nailers on the market, but only a few have the required qualities for efficient performance.
Some of the best palm nailers are usually electric pneumatic machines, and the first consideration is their operational methods.
Operations:
Pneumatic nailers are easy to find on the market because of their benefits to homeowners.
While pneumatic tools use air compressors, they’re also ideal for any home projects such as renovations, ceiling work, and lots more.
Electric palm nailers usually have an internal power source and come at a high price, unlike its counterpart.
You can get pneumatic tools with air compressors, but the case is different for electric machines as they come with chargeable batteries.
The electric tools are ideal for carpentry and construction projects.
Features:
Electric nailers usually come with an 18V or 24V battery unit, making them more convenient than pneumatic tools.
It is advisable to check the machine for old or bad batteries before using the machine. You can power pneumatic nailers with air compressors.
While pneumatic nailers require periodic oiling for optimal performance, you need to charge the electric machine batteries for efficiency.
FAQs
1. Can I Use a Palm Nailer to Sink Finish Nails?
Yes, you can sink finish nails with a palm nailer. While framing nails are usually around 3.5″ and easy to use, palm nailers, are affordable and can sink finish nails of 1.5″ or 2″.
You can use a palm nailer to sink finish nails of smaller sizes and requires a high-powered nailer for larger sizes.
2. Can you Use a Palm Niler for Roofing?
Yes, palm nailers are ideal for roofing projects. Palm nailers are versatile tools that come in handy for construction and home renovations, making them the best choice for your roofing and DIY projects.
In addition, the tool has a lightweight design, ergonomic grip, Anti-Swirl technology, and a powerful motor for optimal performance.
Conclusion
After understanding the process of using a palm nailer, keep in mind that you need to wear protective gear while using the machine.
This tool takes the place of hammers and drives nails with efficiency. You can use the tool for several purposes, including fencing, decking, ceiling, construction, and lots more.
Since the process involves driving nails into materials, be prepared to apply a little force for effectiveness.
If you want an exceptional tool that can drive nails into a block of wood with ease, consider investing in a palm nailer.
Using palm nailers is a challenge for new owners because of their lack of knowledge, so they run into capacity and power supply issues.
The tool is affordable, lightweight, and ideal for any industrial, construction, or personal project.
If you’re wondering how to use a palm nailer, the above steps will help complete projects without issues.