A drill press vise is an essential workshop tool that performs various DIY projects. This versatile tool is handy for woodworkers, metalworkers, and machinists.
A metal and woodworker, for instance, can use a drill press vise when making clear-cut drill holes on solid materials.
A drill press machine is another vital workshop tool that goes hand in hand with a drill press vise.
Nowadays, many DIYers, hobbyists, wood & metal workers, and craftsmen should have a drill press vise and a bench vise in the workshop.
You need to know how to correctly use a drill press vise and the basic drill press vise installation process whether you are a novice or experienced craftsman.
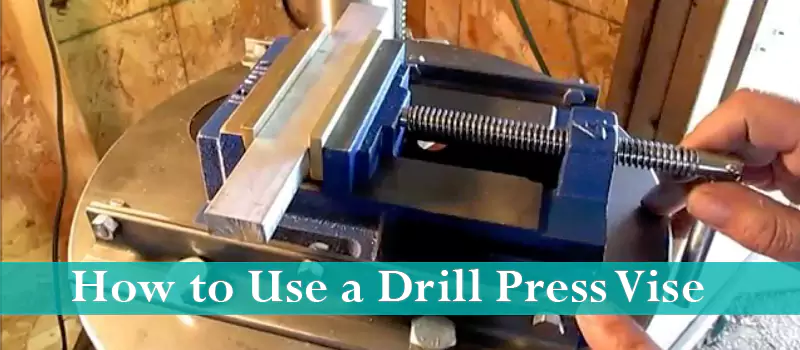
How to Attach and Use a Drill Press Vise
Before using a drill press vise, note that this particular tool is somehow different from a workbench vise. The only difference includes the size, material, and overall appearance.
So, understand the correct steps to attach a vise to a drill press before using any machining or metalworking project.
Utilities required
- 4 or 4 1/2- inch bolts & nuts
- Leg screws
- Two sets of Spanners or a ratchet
A complete drill press setup comprises a vise, a drill press machine, and solid material.
Step 1: Placing the Drill Press Vise into Position
The first step is to place the vise correctly on the drill press table. A drill press vise has mounting brackets/base with an extended narrow allowance. This allowance allows you to lock it into position on both sides.
The drill press table has a matching allowance to enable you to lock the vise into position. You can position the vise anywhere on the drill press allowance.
Always ensure that the drill press vise aligns with the drill press table’s locking holes correctly before you insert the nuts. But it is advisable to place the drill press vise at the center of the table.
Step 2: Mounting and Locking it into Position
After the vise is positioned correctly, attach a vise to a drill press and lock it firmly with the four nuts. Use the exact spanner size or ratchet in this step.
Also, do not forget to put washers on the bolts before inserting them on the drill press vise. We advise inserting two pairs of washers on the head and bottom of the bolts.
These washers will ensure that the vise is locked into position firmly.
Note:
- A 4 or 4 ½-inch long bolt is enough to lock the vise into position.
- For bigger drill press and drill press vises, use 6-inch bolts.
- Ideally, hold the bolt head with a spanner or a ratchet and tighten the nut at the bottom of the drill press vise with another set of spanners.
- Turn the nut clockwise to lock it firmly into position.
Step 3: Clamping Material on the Drill Press Vise
You should place the solid material you want to drill after the vise is locked into position. There are four steps involved.
- Turn the vise handle counterclockwise to open the sliding jaw until there is enough space to insert your material.
- Place a solid material in between the static and sliding jaw.
- Turn the handle clockwise until the jaws firmly grip the solid material.
- Turn on the drill press and continue drilling the holes.
Step 4: Adjusting the Position for Drilling
You can adjust a drill press table to any position by loosening the table clamp handle. So, do not unscrew the drill press vise whenever you want to change the position of the solid material.
Also Read:
Safety Measures When Using Drill Press Vise
There are a few essential safety measures you need to follow before setting up a drill press vise or beginning to work with a drill press machine.
1. Safety Gloves
You risk clamping your hand each time you adjust the vise’s handle while working on a wood or metal project. So, always wear a pair of safety gloves when working with a drill press vise.
2. Locking the Vise Firmly
Never work on a DIY project with a drill press vise that shifts from one position to the other. Remember to lock the vise firmly to avoid accidents while using a drill press.
3. Greasing and Oiling
Greasing and oiling a vise not only prolongs its life. Regularly grease and oil a drill press vise, like any mechanical machining tool to work efficiently.
For instance, the grease will help the vise’s adjustment handle perform as it should. Also, it will reduce friction, wear & tear, and you will not struggle adjusting or quick release drill press vise.
- Adjust the handle until you have access to the entire handle threads.
- Apply the correct amount of grease with grease gun as you rotate the handle.
- Continuously turn the handle until the entire threads are greased.
Conclusion
A drill press and a drill press vise, for instance, are among the few tools that have more than one use.
These particular tools are also essential for woodworkers, metalworkers, and hobbyists.
Note that drill press vises are available in different sizes and brands. But the mounting plate is the same. So, fit a drill press vise on the drill press table securely to avoid accidents in the workshop.
Lastly, understand the dos and Don’ts before you use this versatile tool. After reading this article, you will understand the correct steps to use a drill press vise.