If it is the mowing season, and grass has grown, you need to turn on the motor’s starter button of your lawn mower.
If you are facing some troubles; it might be due to a damaged starter motor.
Don’t worry! You can fix your lawn mower starter. Do you need to rebuild the lawn mower starter? This ultimate guide about rebuilding a lawnmower motor starter.
Each type of mower is designed for its purpose. Some are non-powered for small lawns, and others are electrical engine-powered push mowers, particularly for larger 3 to 5 yards.
There is an engine starter bolted to the engine crankcase in electrical mowers, which starts the lawnmower engine. However, the starter motor might show some errors in operating.
Thus, leaving you with no other option than to rebuild it or replace it. Here is what you need to learn when fixing your lawn mower starter.
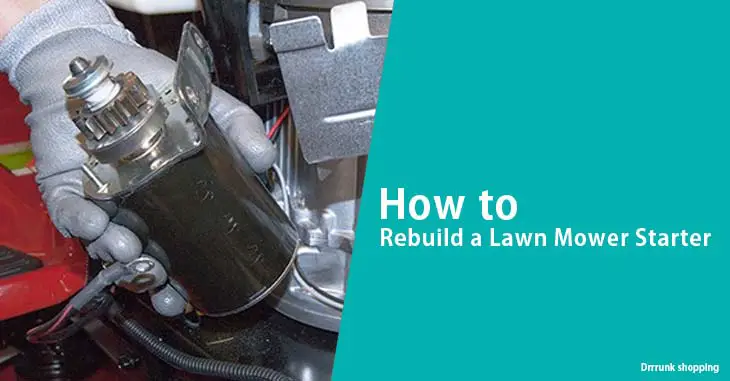
How to Rebuild a Lawn Mower Starter
Besides starter, other components like battery, electrical connectors, wiring, and starter solenoid can also cause obstacles.
Electrical starting systems show common problems due to improper charging, bad battery, corroded or burned wires, and faulty electrical components.
Once they are all tested and functioning fine, the starter motor is what you need to fix immediately.
Repairing time depends on the difficulty of the task. For moderate repairing, 30 minutes are required.
Step 1: Test the Starter
Track the battery and the starter after lifting the hood of the lawnmower. You will find the electrical posts where wires are connected to both battery and starter. Remove all the dirt and debris by brushing off the posts.
The weak electrical connection can also be a problem. Take the black wire and attach one end to the battery’s negative post and the other end to any metal.
Also, connect the red wire to the positive post of the battery.
Now, place the red jumper wire to the positive post of the starter. It will go over if the starter is okay. But if not, then rebuild the starter.
Note: don’t forget to wear your rubber gloves.
Step 2: Investigate the Problem
If you see that your mower is not correctly working, then check the reasons for its failure.
In a starter motor, the major components are springs, magnets, and brushes contacting with wires are likely to fail.
And, the reasons for failure are wearing, dirt, or burning inside the starter. The starter motor spins the engine flywheel on the motor plunger to turn the start button.
But if it does not spin, then replace it with the one compatible with your model.
Step 3: Assemble the Repairing Kit
After you diagnose the problem, you need to collect a tooling kit to fix the starter. Other than working gloves, you are required wrench set and net driver set.
Step 4: Remove the Battery
Put your repairing kit near and start the work by turning off the ignition switch. Remove the key and pull the seat upwards. Then take off the bolt tied with a negative cable to the battery.
Moreover, insert the battery away to ensure that it does not meet the battery post.
Step 5: Take Off the Engine Blower Housing
In this step, you have to remove all the engine blower housing carefully. Start with removing the air duct mounting screws to take off the air duct.
Remove the air filter cover by rotating it anti-clockwise and then pull off the air filter.
After taking off the air filter housing screw then you have to remove the front and rear blower housing mounting bolts.
Step 6: Dislocate the Old Starter Motor
After removing the blower housing starter, it is time to drop down the old starter motor. First, take off the lower dash fastener to remove the lower dash.
Then, take the nut set for removing the wire mounting nut in order to pull off the wires of the starter motor.
Disconnect all the mounting bolts of the starter, and a wire retainer will come off from the left bolt.
Now take out the starter motor.
Step 7: Place the New Starter Motor
Install the new starter in the previous one by attaching the motor with the right mounting bolt. Reverse the process and place the wire retainer along with the left bolt.
Secure the left mounting bolt firmly. Now, connect the starter wire with the mounting nut. Bring the lower dash back into its position and tighten it firmly.
Step 8: Reinstall the Engine Blower Housing
It’s time to place the blower housing back on the engine. Reinstall the mounting bolts and air filter housing screw. Please pick up the air filter and positions its cover on the machine.
Now turn the knob on the cover in a clockwise direction. Place the air duct and grip it tightly with the mounting screws.
Step 9: Insert the Battery
Now you have placed the new starter motor and reinstalled all the blower housing, reconnect the battery.
Place the negative wire to the negative post of the battery and lower down the lifted seat.
Start the key and check if it is functioning properly now. Happy mowing!
Also Read: How to Thicken St. Augustine Grass
FAQs
Below are answered some frequently asked questions related to lawn mowers starter fixation.
1. How Do I Know If My Lawnmower Starter Is Bad?
If your mower does not respond when you start it many times, it indicates that your mower is bad. Test the electrical problems and check the wire winding inside the starter motor.
If the parts inside the starter are worn, dirty, or burned, it will not function.
Other indications are cranking noise and sparking when the button is pressed.
2. How Much Does It Cost To Rebuild A Starter?
The prices for rebuilding parts of a starter range from $50 to $350, depending on the quality of the starter.
A fresh starter can cost from $80 to over $350. Any qualified mechanic will ask you to pay between $150 and $1000 to replace the starter.
However, the prices vary from mechanic to mechanic and place to place.
3. How Long Do Rebuilt Starters Last?
Usually, lawnmower starters last about eight to ten years with proper maintenance. It can last only 2 or 4-5 years if not maintained properly.
4. Can AutoZone Test Starters?
Yes, AutoZone can deal with your mower’s starters’ problems for free. It can test the parts of the battery, starter, and voltage regulator.
Conclusion
Smooth functioning lawn mowers make your yard chores easier and save your time. It has a battery, electrical connectors, starter solenoid, and engine.
You have to maintain and keep them clean in order to ride your mower.
Imagine if you think of mowing your grass one day and bringing the mower.
But when you start the key, it does not operate. Of course, your regular mowing is no more enjoyable, and it will ruin your day.
If you find trouble, the faulty starter is likely to be the reason. It can cause problems due to burned, dirty, or corroded wiring. Replace the old starter motor with the new one and check the results.
You need not worry since replacing a lawn mower starter can be an easy process with the right guidelines.
Helpful Resources: