Jacking is a skill that all car owners should acquire in case they need to change tires or work on their vehicle in an emergency situation.
Knowing that most of their customers are handymen, GMC usually includes jacks in most of its trucks.
Perhaps you have taken it out at some point and don’t know how to put the jack back on GMC Sierra.
Or maybe it was misplaced by the previous owner and you want to keep it in its proper place.
Therefore, I will attempt to guide you through the process of putting the jack back inside your Sierra.
Note that this tutorial is valid for most GMC vehicles that share the same platform as Sierra such as the Chevy Silverado.
Since GMC is a large company, a lot of its cars share parts amongst each other, and therefore even if you do not own a Sierra, this article may be of aid to you.
3 Steps to Put the Jack Back in a GMC Sierra:
Putting the jack kit back in your Sierra can be a daunting task. Owners tend to remove their jack gear kit for a number of reasons.
Regardless of what the reason may be, you still need to put the jack back in its place.
If you don’t then there is a possibility that you may displace or lose it. Losing it would also reduce the resell value of your car as some owners tend to care about original parts and are willing to pay more for them.
While taking out the jack seems easy, putting it in is in fact a little more tricky in comparison.
One could even argue that it requires an experienced pair of hands to complete this task.
The jack gear is usually found in the same place as the tire iron since they are mostly used together.
However, if yours are placed separately, you might want to consult the owner’s manual to locate them both.
Of course, improper installment of your jack will result in it moving around a lot.
Therefore, it is very important to be cautious while working with your jack. If you’re not careful, you may leave it making rattling noises which can get very annoying.
Hopefully, this article will assist you in putting your jack back in place. Here is a step by step tutorial on how to put the jack back in :
Step 1: Gather the Necessary Tools
It may not be easy to remove or put the jack back with your bare hands. There may be dirt or rust, so make sure you have a handy pair of gloves with you before attempting this operation.
Again, removing and putting back the kit will require the removal of nuts which could be needing the use of a nut splitter.
Therefore, make sure you have all the materials required in hand while working on the car.
Step 2: Remove the Passenger’s Seats
Now it is time to locate the jack kit within your vehicle. The actual location of the kit depends on which model your car is.
However, most GMC trucks usually have their jack mounted under the passenger’s seat that is directly located behind the driver. This is why that is where we will look first.
To look under the seats, firstly open the back doors so you can access the back seats.
Then simply push them upwards. GMC Sierra’s back seats are foldable so they should go up very easily.
Once the seats have been lifted, look at the flooring of your truck for a place to install your jack.
If your jack is meant to go under the passenger seats, then you will see a holder over there.
The holder is somewhat shaped like a triangle.
This holder will be under one of the passenger seats and the other seat will contain the tire iron.
If the holder is not there, then you will have to look into your owner’s manual to find the right placement for your jack.
However, if your holder is there, then it is a simple process to put the jack back inside.
Step 3: Put the Jack Back in Your Sierra
After locating the mounting point and fetching the jack that belongs to your Sierra, it is now time to install the kit in the car. The jack is meant to be placed with the wheel chalks.
Your truck usually comes with two-wheel chalks that are used to keep your car from rolling.
Put the two-wheel chalks together in a way so that one comfortably sits on top of another and place the jack on top of them.
After putting them back together, they should form a triangle-like shape.
Now take the jack and wheel chalks and place them on the holder. The toothy jagged side of the wheel chalk should go on the right side of the car (Your Left). And the head of the jack will go on the other L-shaped side.
Now rotate the large yellow lever anti-clockwise until the jack attaches itself tightly to the mounting point.
Once it is fit snugly, your jack will be properly installed and you can put the backseats back where they belong.
If the car continues to make noise or jiggle, then you may need to seek professional help as there may be other more serious issues with your vehicle.
Keep in mind
Finally, it is important to keep in mind that your installment needs to be snug. If you do not fit it in properly, then it will rattle and make unpleasant noises.
So, rotate the yellow lever as much as you can until you are satisfied with its rigidity.
These components are made to endure pressure so you don’t have to worry about breaking them.
Therefore better overcompensate with the tightening than bear through rattling later on.
Also, check our complete guides:
- How to Replace Rear Main Seal Chevy 350
- How to Attach a Vehicle Recovery Strap
- What is Tonneau Cover and Does Tonneau Cover Save Gas?
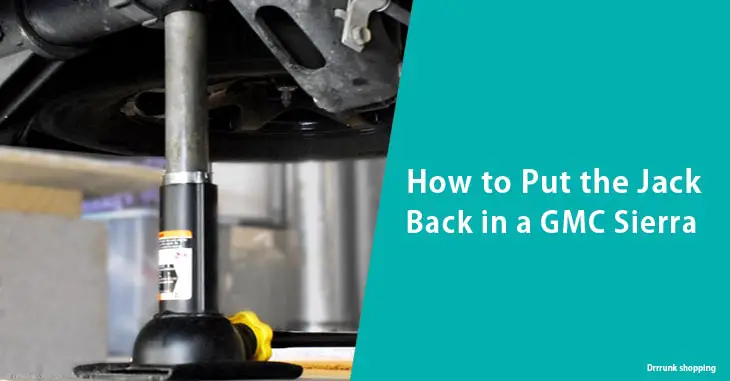
GMC Sierra Jack Points
After you take the jack out of your vehicle, you will want to make use of this tool to jack up your car.
To make the jacks work, you need to find the jacking points where the tool engages.
Luckily the jacking points are accounted for when the manufacturers design their vehicles.
The points where the vehicle is to be jacked are usually reinforced with extra metal ribs so that they can hold a lot of weight.
Usually, most vehicles come with 4 jacking points for their four tires. These points are always located under the rocker panels a little behind the front wheels and slightly in front of the rear wheels.
However, the jacking points for different vehicles are usually located in different places so if you are not sure where the jacking point for your particular model is, refer to your owner’s manual.
Not all of the points under your car will be capable of sustaining the weight of your vehicle.
The jacking points mentioned in the owner’s manual are guaranteed to be capable of handling a lot of weight.
Therefore, even if other points can handle jacking your vehicle a few times, they are not likely to sustain jacking on a regular basis.
Again, jacking from points not recommended by the manufacturer may go against your warranty.
This is why it is advised to only jack up your GMC Sierra using the jacking points your owner’s manual recommends.
Conclusion
GMC releases a lot of cars every year. Therefore, as a cost-cutting measure, their cars often share a lot of design ideas and parts.
If you know how to remove the jack kit from your GMC Sierra, you should also be able to remove the floor jack from a Jeep Grand Cherokee.
Therefore, by learning how to put the jack back in a GMC Sierra, you will also be able to learn how to work on plenty of other GMC vehicles as well.
The jack kit and its attachment to your car are very important for the stability and comfort of your car.
If you do not remove or attach the jack properly, then it may result in rattling and unnecessary noises which could result in an unpleasant experience for the passengers.
While putting the jack back may feel difficult, hopefully, this article will make it easier for you to accomplish this task.