It is pretty much easy to repair a large hole in a drywall. So, what’s the way of filling large gaps in drywall? The best solution is using drywall mud.
Drywall mud is a gypsum mix that helps repair holes in drywall. It is also used to plaster and strengthen drywall joints.
You must pay close attention when dealing with drywall because it tends to crack if the installation is not done correctly.
New drywall installations include gaps between sheets for expansion. With time, these gaps begin to beam open and leave large holes, leaving the area looking unfinished and unattractive.
Luckily there are a few methods used to solve this problem.
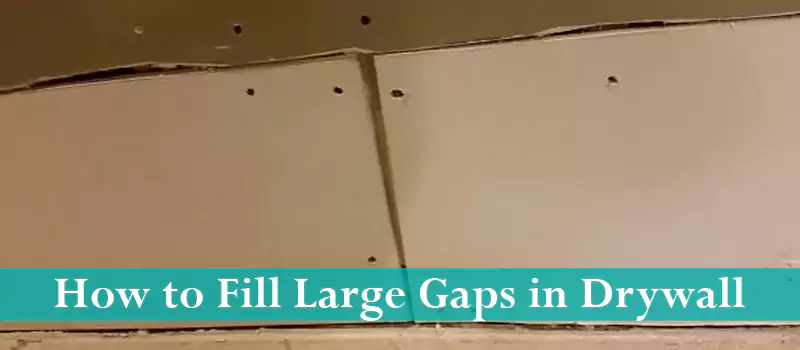
How to Fill Large Gaps in Drywall;
Step 1: Applying a Caulk Remover
You will need to apply a caulk remover to remove the caulk in the gap you intend to fill. Follow the directions in the package of the caulk remover to avoid any mistakes.
Once you’re done with that, remove it from the gaps with needle-nosed pliers. Scrape off the remaining pieces using a utility knife.
Step 2: Driving Screws With a Screwdriver
Using a screwdriver, drive loose screws along the edges of the gap into the gap. The head of the screw should be flushed with the drywall surface.
Step 3: Applying a Drywall Hammer
Using a drywall hammer, drive nails into the walls until the head of the nails is flushed with the drywall surface. Hitting the nail too hard should be avoided to prevent damaging the wall.
Step 4: Applying a Utility Knife
Use a utility knife to cut away rough edges along the sides of the gap. These rough edges can cause unpleasant bubbles later if not removed.
Next, spray torn edges with a stain-blocking primer, including places where paper is not covering the filler materials inside of the drywall.
Step 5: Applying Setting Compound
Scoop the setting compound with a taping knife and drag it across the joint so that the compound spreads evenly and packs into the joint tightly.
When dealing with gaps around an outlet, drag the taping knife across the starting point and move toward the surrounding wall of the outlet.
Smoothen the edges of the compound so it can blend with the surrounding wall.
Leave the compound to harden before using a taping knife to scrape bulges or missed points.
Step 6: Applying All-purpose Drywall Compound
Use a taping knife to mix all-purpose drywall compound until a creamy, frost-like consistency is achieved. Spread a layer of the drywall compound over the patch. Smoothen the edges so that they can blend with the surrounding wall.
Spread the tape over the gaps between sheets. This should be done while the drywall is still wet. The next step is to smoothen the tape using a 12-inch drywall trowel.
Next, apply a thin layer of drywall compound over the tape and cut away bubbled tape using a utility knife. Apply more drywall compound over the patch.
Step 7: Sanding the Edges and Paint
Before you begin this step, it is advisable to put on protective wear such as goggles and a mask. Sand the edges of the patch using 120-grit sandpaper. Clean the area of sanding residue with a piece of cloth.
After that, paint the area to match the surrounding wall. You might need a second coat of paint to properly conceal the patched area.
Do you also need to fill an uneven edge of drywall? There are various steps to do that. If the gap of an uneven edge of drywall becomes too wide, it requires urgent attention.
Filling Large Corner Gaps in Drywall;
Step 1: Cutting the Corner Bead
Begin by cutting your corner beading to the length required to fill the gap between the two drywall sheets using tin snips.
Step 2: Preparing Patch Compound
Patching compounds are different from joint compounds. Pour the patching compound into a mixing bucket. Add water occasionally as you stir until a peanut butter consistency is achieved.
Step 3: Filling the Gap
Using a 4-inch drywall blade, apply the patching compound to the gap and scrape it flat with the drywall blade.
Step 4: Installing the Corner Beading
Once the patching compound is hardened, nail or screw the corner beading to the corner of the wall. Next, apply thin coats of joint compound to smoothen the corner.
Filling a Gap Between Wood and Drywall;
Wood may expand with seasonal and weather changes, thereby creating a gap. You will need to cover gaps between wood and drywall as soon as you notice them.
Step 1: Filling Gap with Caulk
Using the suitable drywall adhesive is ideal for this purpose because it adheres firmly to the wood and drywall surfaces.
Use a caulking gun to fill the gap with as much caulk as possible without letting ant protrude from the gap.
The caulking gun applies the caulk more evenly.
Use your finger to press the caulk deep into the caulk and allow the caulk to air dry.
Step 2: Applying Joint Compound
Embed paper drywall tape in the joint compound over the drywall side of the joint. Then apply a coat of joint compound over the joint on the drywall side and apply a piece of paper drywall tape over the joint compound.
You can use a drywall bazooka for applying the joint compound easily.
With a 6-inch drywall knife, scrape the excess joint compound underneath the drywall tape. Apply joint compound over the tape to conceal it and allow it to air dry.
Step 3: Sanding the Edges and Paint
Put on your goggles and mask before you begin to sand the edges with 100-grit sandpaper until smooth.
Clean the area of sanding residue with a piece of cloth.
After sanding the edges, paint the area to match the surrounding wall. Allow the paint to air dry completely.
You might need a second coat of paint to conceal the patched area properly.
How to Fill Drywall Gaps Between Wall and Ceiling?
A gap can occur between the wall and ceiling due to mistakes during installation. It could also occur due to changes in the height of the ceiling across the length of a wall.
To cover large drywall gaps between wall and ceiling, the following steps must be followed:
Step 1: Applying Mesh Drywall Tape
Cut a strip of fiberglass mesh drywall tape with a utility knife as needed to fill the gap. Place the mesh drywall tape over the gap to flush against the ceiling.
Step 2: Applying Joint Compound
Cover the mesh drywall tape with joint compound or drywall mud using a putty knife. Press the joint compound firmly until it passes through the small holes of the mesh drywall tape and into the gap.
Spread the joint compound about two inches beyond the borders of the tape on both the wall and ceiling sides.
Step 3: Placing a Paper Tape
The next step is to place a strip of paper tape over the corner between the wall and ceiling. Use the putty knife to create a crease on the tape between the two surfaces.
You can then apply a coat of joint compound on the wall and ceiling to provide firm support for the tape.
Step 4: Applying More Joint Compound
Apply a thin coat of joint compound over the tape. Spread it over the tape and drywall using a putty knife.
Feather the edges so that they can blend into the drywall.
Step 5: Allowing to Air Dry and Repeat Process
Allow the joint compound to air dry completely before repeating the covering process. Cover with some more joint compound and place another strip of tape.
Add a thin coat of joint compound and feather the edges so they can blend smoothly. Again, allow this second layer to air dry completely.
Step 6: Sanding and Painting
Once the layer is completely air-dried, put on your goggles and mask before you begin to sand the dried joint compound with medium-grit sandpaper before switching to fine-grit sandpaper.
You need to sand the dried mud so that it can smoothen out and blend with the drywall. Clean the area of sanding residue with a piece of cloth.
The next step is to paint the patched area with a paintbrush to match the surrounding wall.
Allow the paint to air dry completely before applying a second to conceal the tape and joint compound properly.
Conclusion
Drywall installation must be done with precision and carefulness to prevent future problems like large gaps between sheets.
Drywall tends to crack if it is not installed correctly from the beginning, hence the need for close attention and carefulness.
These large gaps could also be caused by seasonal and weather changes causing the wood to expand and creating a gap in drywall.
Drywall gaps between wall and ceiling could also occur when the ceiling changes height across the length of a wall.
When these large gaps happen, you can be thrown into a whirlpool of confusion, especially if you do not know what to do.
When next you notice a gap between drywall and ceiling or drywall and wood, all you need to do is follow the steps above, and the problem will be fixed.