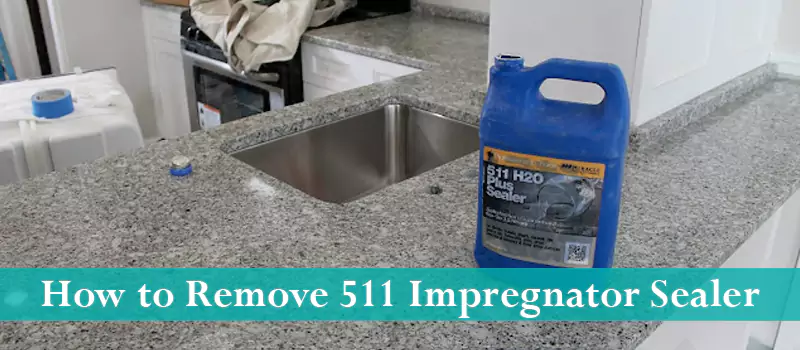
The 511 impregnator sealer is a popular product used to protect porous surfaces. It can be used on various surface types, including ceramic, tiles, slates, flagstone, limestone, etc. It’s very effective at keeping these surfaces moisture-free and protecting their textures.
As an impregnator sealer, it covers both the surface and the internal pours for maximum protection. It goes into the pores and resists moisture, and also creates a layer on top of the surface for additional protection.
Being a permanent sealer with long-lasting performance, the 511 impregnator sealer can be difficult to remove. Not all surfaces need a sealer for protection, like most quartz countertops.
Having sealers or impregnators can hamper the shiny surface texture of these. In that situation, we might need to remove the sealer.
How to Remove 511 Impregnator Sealer
Removing the 511 impregnator sealer can be tough and lengthy unless you got the right ingredients. For this operation, you’ll need some basic things:
- A soy gel paint remover/stripper
- Plastic sheets
- Hand sprayer
- Cloth to wipe
Now let’s remove 511 impregnator sealer from the surface.
Step 1: Preparing Target Surface Area
This only applies if you need to remove the sealer from a specific area. You don’t want the remover to reach areas where you want the sealer to sit. A plastic sheet can be used to cover up the rest of the surfaces easily.
Make sure the target surface is open for spraying and cover any unwanted areas. That’s because paint removers can work their charm and remove the color from places you never want.
Step 2: Prepare the Paint Remover
To do so, we use a hand sprayer and a paint remover. This is a common solution that can be found in most hardware stores. The remover should be soy-based. Usually, we can find these in bottles labeled as “paint & urethane stripper” or “soy gel paint remover”.
These paint removers are useful to remove not only paints, but also sealers, epoxies, enamels, and various other liquids. They react chemically but should be used only when necessary as they can leave marks.
While buying the remover, be sure to check that it doesn’t contain any harmful bases or methylene chloride. They’re both harmful to health and the surface itself.
After getting the paint remover, pour it into a bottle and attach a hand sprayer. Now you can spray this on the floor uniformly.
The sprayer ensures you don’t use the remover too much. As the remover is prepared, we can now apply it.
Step 3: Spraying the Paint Remover
After filling the sprayer bottle with the remover and covering up unwanted areas, now it’s time to apply it. Gently spray the paint remover onto the surface.
The remover starts a chemical reaction with the impregnator sealer. Don’t hold the sprayer bottle too close to the surface. It’ll cause too much spray on a small area.
A small amount is sufficient for the usual sealers, but for the 511 impregnator sealer, we might need a bit more. As it’ll go through both the surface coating and the pours.
Now it’s time to wait for about 5 to 10 minutes. It takes a bit more time to go through the 511.
Check if the applied remover is enough for the impregnator sealer. If it seems insufficient, apply a bit more again.
Step 4: Clean Excessive Liquids
After the sealer is completely gone from the target area, we can clean off the surface. Use a water pipe or mug to apply water and wash off the residue remover.
After that, you can now remove the plastic sheets covering other areas.
After testing, take a piece of cloth to rub and dry the surface. Then wait for an hour to dry the surface. Now we’ll see how to test if this method worked.
Step 5: Testing
You can test if there’s any impregnator sealer left by applying water. If there’s a residue sealer, water will create beads rather than make the surface wet.
If the surface gets wet and water spreads, it means the sealer is completely gone and water is getting into the pores. If the sealer is still left, go back to step 3 and apply some more remover.
This is the fastest way to remove the 511 impregnator sealer. But for some reason, you can’t find the paint remover, you can try vinegar.
They’re mild and not that effective, but can remove some sealer from the surface.
Why is My Concrete Sealer Sticky?
After applying sealers on a block of stained concrete, sometimes we can see some portions still sticky. The main reason for this is too much stain presence.
Beyond a certain amount of stain, the sealer can fail to clean up. It also works against the sealer and breaks their bonds.
Another reason is not waiting long enough after applying sealers on a surface. Applying moisture within an hour of sealing can cause this issue.
To tackle this issue, at first we need to remove the sealer from that area. We can do this by following the previous methods mentioned.
Manually scrape the tacky portions and make them clean. Then apply the sealer once again to get a surface without the stickiness.
What is the Difference Between Sealer and Impregnator?
As we’re talking about removing the 511 impregnator sealer, it works as both. But there are dedicated sealers and impregnators, and they have some differences.
The main difference is in their name. Sealers work as a coating and seal the surface. They sit on the surface.
But impregnators don’t sit on the surface. Instead, they go into the pores of the surface. Both are effective but different approaches.
As they sit on top, we see that sealers usually change the surface appearance. So, the surface color gets mixed with the sealer color, which is usually clear but foggy.
But impregnators don’t change any appearance because they aren’t visible. They hide in the pours.
Another difference is, sealers are more effective at protecting the surface as they prevent any moisture into the pour too. But they can get damaged and scraped off easily after rapid friction.
Impregnators are more susceptible to stains as they’re allowing them more space.
But they stay intact longer because they sit into the pours firmly and don’t get influenced by outside friction.
How to Remove a Sealer Applied to a Quartz Countertop?
Sometimes quartzite sealers can resist moisture and stain the countertop. Depending on what they’re used for, applying sealers on them might do more inconvenience rather than shining.
That said, there are certain ways to remove a sealer from quartz countertops.
Step 1: Cleaning the Surface
You can easily clean the surface with a dryer or vapor cleaner. These are effective at cleaning off dust particles. As the vapor is heated, it dries out quickly too.
Step 2: Apply Tile Cleaners
You can find various tile cleaners on the market. Just buy one and apply them to the clean countertop.
For convenience, use a piece of cloth and rub the cleaner onto the countertop for an even spread.
Step 3: Wash Off
After applying the cleaner properly, let it sit for half an hour. That should get the countertop back to its default state. Now, wash off residue cleaners and sealers with water thoroughly.
It’s easier to remove a sealer from a tile as they sit on top of them. By using a good tile cleaner, you can remove the sealers from quartz surfaces easily.
How Long Does 511 Impregnator Sealer Last?
As rated by the manufacturer, the 511 impregnator sealer has a 12 months shelf life under 40C temperature.
This duration increases with lower temperatures because of less moisture content in the air. At 25C room temperature, the sealer will last more.
This is possible due to the impregnator and sealer actions. It’s more difficult to remove the penetrating sealer.
Sealers go off quicker because they’re sitting on the surface. But as we’ve seen, impregnators stay longer.
So, even if the sealed portion goes away, you’ll still get some protection because the pours are likely still filled.
Conclusion
In this article, we’ve talked about the options for removing 511 impregnator sealants.
For effective cleaning, we should start with less paint remover and then go with more if needed.
While buying the cleaners and removers, check if they contain harmful chemicals like methylene chloride.
Ensure proper and uniform spraying over surfaces and test each step to see how the liquids are performing.
Depending on how well it’s sitting on and into the surfaces, removing with different chemicals might leave some marks too. While handling these chemicals, be sure to take proper precautions at all times.
These are hard chemicals, so they prevent any skin contact and unwanted spillage. With all steps taken accordingly, the impregnator sealer should be removed completely.