How to attach hook and loop sandpaper? The sandpaper consists of material close to the one used in Velcro.
It also comes with hooks and loops to secure the sandpaper to various machines like a disc or random orbital sander. As a result, changing the sandpaper becomes a piece of cake.
When properly attached, the gripping is superior, meaning they don’t slip on the pad. But when you flat the hook and loop sander to try and gouge sand, heat will build up and melt the hooks.
Also, excessive force and keeping it on the same spot for a long time creates more heat.
When the hooks melt, the sandpaper can no longer grip the sander, making it fall off while sanding.
The only solution is to replace it. The process may differ based on sander types, but here is a comprehensive guide on how to do it;
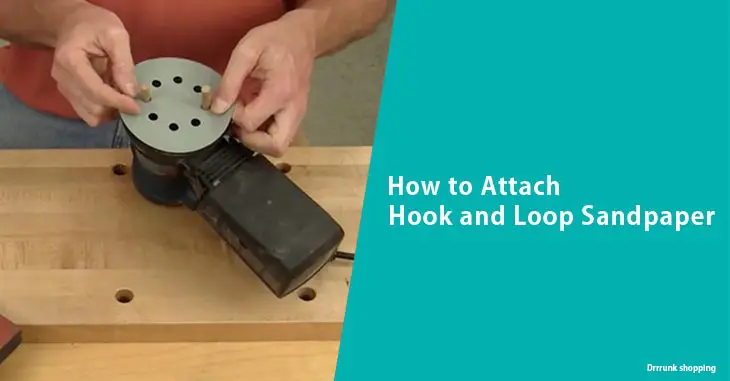
How to Attach Hook and Loop Sandpaper
Step 1: Collecting the Required Materials
Before starting to attach hook and loop sandpaper, you need to accumulate everything you need for the procedure. You will require;
- Sander
- A new hook and loop sandpaper
- Converter disk if your sander is not compatible with the hook and loop system
- A new sander pad if worn out
- A screwdriver
- A part brush or compressed air blower
Step 2: Get Details of Your Sander
The hook and loop sandpaper work excellently on specific power sanders like the Orbital sanders. Others like dual action sanders use a sheet of paper.
For those not compatible with the hook and loop system, you can make them suitable by using a converter disk.
Also, check your sander’s use and specifics, like the size. You will require a hook and loop sandpaper that fits on the sanding pad.
Step 3: Remove the Old Hook and Loop Sandpaper from the Sander Pad
This stage is applicable only when you want to replace or change hook and loop sandpaper.
But if you are fixing one on a sander for the first time, you need to proceed to the next step. Peel off the sandpaper.
Step 4: Inspect the Sander Pad
It does not make sense to replace a new hook and loop sandpaper on a damaged sander pad.
It will interfere with the efficiency and life of the sandpaper, forcing you to keep on replacing a new one now and then. It will result in a waste of time and money.
It’s wise to check the sander’s pad and replace it in case of a problem to avoid such expenses and inconveniences.
Step 5: Unscrew the Screws on the Sander’s Backing Pad and Remove It
You can now see the sander’s backing pad after removing the old hook and loop sandpaper from the sander. It consists of some holes with screws.
Take a screwdriver and unscrew those screws if you need to change them.
Then pull out the pad, exposing the parts lying underneath it.
Step 6: Clean the Exposed Parts
Mostly, the area behind the pad requires cleaning. It will enhance the sander’s efficiency. Use a parts brush and brush out everything until spotlessly clean.
If you don’t have a brush to clean the parts, you can try blowing the area out with a reliable air pressure cleaner.
Step 7: Screw the New Sander Pad
After cleaning, attach the new sander pad. The new pad comes attached to a backer. Please place it in the cleaned area and line up the holes.
Then put the screws in the holes and use a screwdriver to screw them tightly. It will help secure the new sander pad.
Some sanders come with a spline or something similar. If yours has one, ensure you line up the holes on that, and the backing pad sits all the way down on the sander as required.
If not, the screws will not line up easily.
Step 8: Put the New Velcro On
After screwing the sanding pad firmly:
Test it to ensure it turns appropriately. If okay, take the Velcro piece, peel the sealing part off, and stick it on the sanding pad.
Ensure the holes line up correctly.
To avoid mistakes, peel it halfway and line it up on the sander pad. Then pull the rest of the backing out, aligning the Velcro properly. Next, press the Velcro using your hands to secure it properly.
Step 9: Attach the Hook and Loop Sandpaper
After fixing your new sander pad, it’s time to attach the new hook and loop sandpaper. Align it correctly on the Velcro and stick it on.
Apply pressure from above and below the sandpaper to make it secure properly.
The bond created between the two surfaces becomes strong, and you can easily peel the sandpaper back when you want to change it.
After finalizing this stage, you will have successfully fixed a new hook and loop sandpaper on your sander.
As illustrated above, the process is straightforward and consumes less time. Also, it’s essential to use a hook and loop sandpaper because it comes with so many advantages. They include the following;
Benefits of Hook and Loop Sanding Disc
You can never go wrong with using sanding pads hook and loop. You will enjoy the following;
Optimal Results
Whether a hook and loop sandpaper has pressure holes or not, its efficiency level is very high. You will still get quality results no matter the grit in a sanding disc.
Though all sanding discs are efficient, some brands are better than others.
Convenient
Modern sanding discs do not tear, fall apart, or become useless quickly. Thanks to the fact that they do not come with an adhesive, like the earlier sanding discs styles.
Sticking substances used lose their power with time as the sanding disc operates. Eventually, the sand discs lose grip and fall off.
Also, today’s sanding discs don’t get screwed in, meaning they don’t fall victim to the center hole, which tears them apart.
The Velcro also plays a vital role in ensuring that the sanding discs stay in their position and do not move. The reliability of hook and loop sandpapers is guaranteed.
Easy and Fast to use and Replace
Hook and loop sanding discs are easy to use. You only need to install them on an ideal sander.
Also, installing new ones or replacing an old or damaged hook and loop sandpaper is like a downhill task.
You only need to pull it off to remove one or press the sanding disc on the sander pad to attach it.
Flexible
You can use a hook and loop sandpaper for any work on wood, metal, or other material.
Thanks to the fact that they come in grits of various kinds and sizes. It was not possible to work on some projects using the older sanding disc versions.
Also, you can reuse an old hook and loop sanding disc. You only need to keep it aside safely until the next time you want to use it.
Price Worthy
Though the prices of hook and loop sanding discs are higher compared to other sanding discs found on the market today, every dime is worth it.
They are durable and easy to use, install, and remove. The discs also perform better than other versions of sanding discs.
FAQs
1. Is Hook and Loop the Same as Velcro?
They are similar. Both get designed with the same materials. They consist of loops on one side and hooks on the other.
2. What Sandpaper Do I Use for Wood?
Not all sandpapers are suitable for wood. Some may damage or scratch it. Using the right sandpaper produces the expected results.
Rough wood contains loose fibers, dips, splinters, or gouges. The best sandpaper to use on such a surface is 60-grit or 80-grit sandpaper.
100-grit sandpaper is ideal for preparing the wood surface for finishing.
Great examples of such wood surfaces are furniture made using lumber and plywood. If you want to refine the wood surface ready for finishing, use a 180-grit 0r 120-grit sandpaper.
3. What is Hook and Loop Patch?
It is similar to Velcro. The patch comes with a special backing that makes it easy to stick on various surfaces.
The support contains tiny loops and hooks. Examples of hook and loop patches are those used in the military.
Conclusion
As illustrated above, hook and loop sandpapers are essential in any workshop. They are helpful in smoothening various surface types.
But due to certain factors discussed above, the sandpaper generates excessive heat while in operation. As a result, the hooks meltdown, making the sandpaper useless.
At this point, you need to change or replace the hook and loop sandpaper or disc.
Fortunately, the process is like a walk in the park, as demonstrated above. You can do it at home, qualifying it as an excellent DIY home project.
Related Guide